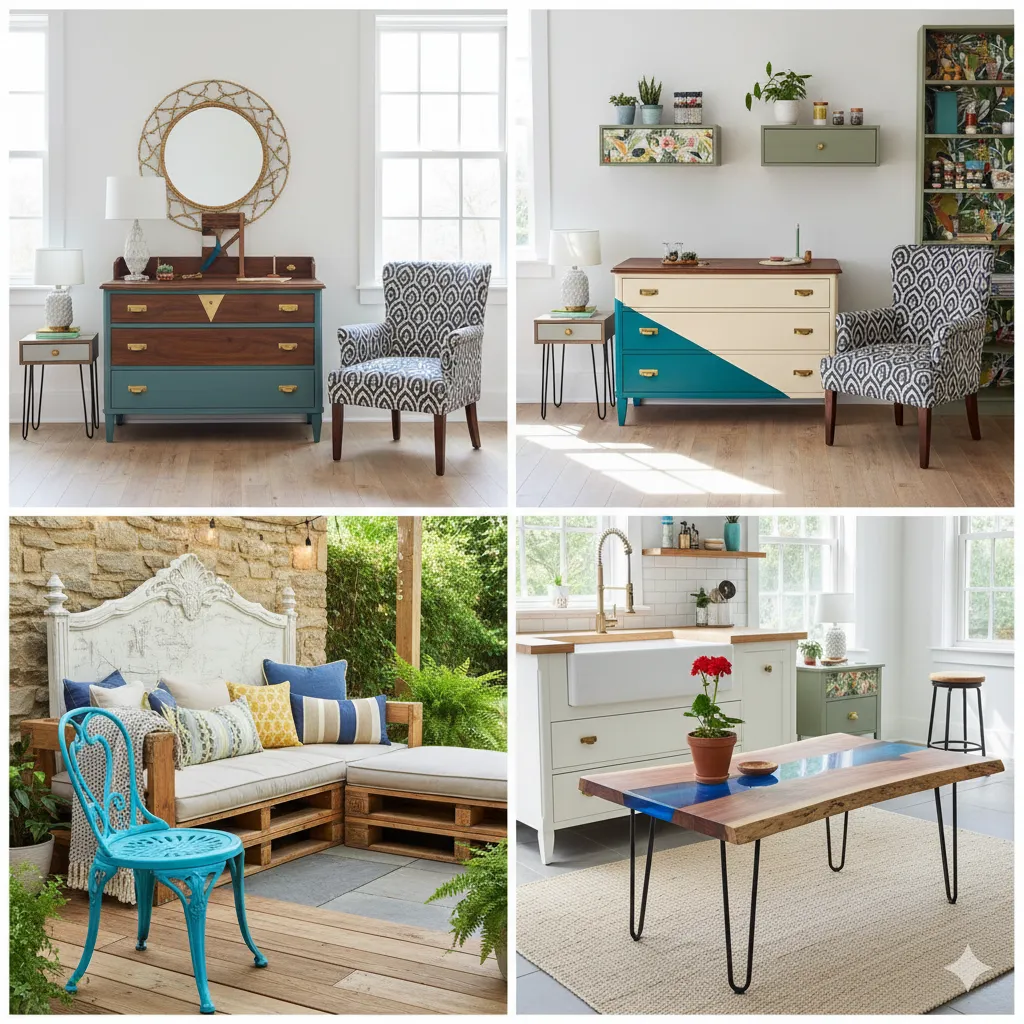
You know that old dresser sitting in the garage? The one with the peeling veneer and wobbly drawer? Or maybe it’s a coffee table that’s seen better days, covered in a zillion ring marks from forgotten glasses. For years, you’ve probably looked at it and thought, “What a shame.” Maybe you even considered taking it to the dump. But what if I told you that sad-looking piece could be your next favorite thing in your home? What if it just needed a little love and a new perspective?
Upcycled furniture isn’t just a trend; it’s a movement. People are waking up to the fact that fast furniture is a total waste of money and resources. Why buy a flimsy new dresser from a big-box store when you can turn a solid, vintage piece into something truly unique? Upcycling is about sustainability, creativity, and saving a ton of cash. And, honestly, nothing beats the feeling of looking at something you brought back to life yourself. It’s like magic, but with more sandpaper and paint.
In this article, I’m going to share 15 upcycled furniture ideas that are a total game-changer. We’ll cover everything from simple paint projects to more ambitious repurposing. You’ll get a look at some stunning before-and-after transformations, a list of materials you’ll need, and a heads-up on the difficulty level. Get ready to feel inspired, because that next masterpiece is probably already waiting for you in your basement or at your local thrift store.
I. Paint & Finish Makeovers
This is where most upcycling journeys begin. A little paint can totally change the vibe of a piece of furniture, and it’s one of the easiest ways to start.
1. Chalk Paint Transformations
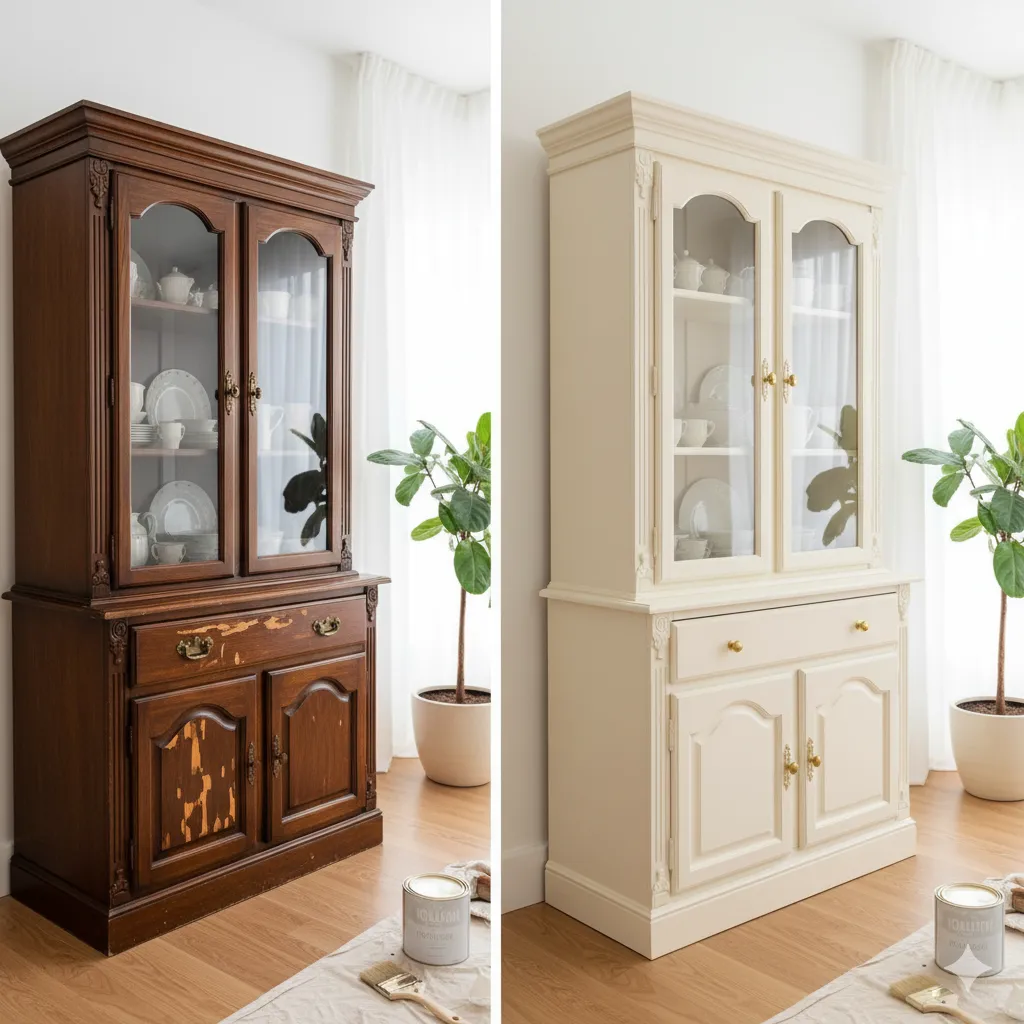
This is my absolute favorite way to give an old piece a new life. Chalk paint adheres to almost any surface without a ton of prep work. You can take a dated, dark wood dresser and turn it into a light, airy statement piece in a single weekend. It dries quickly and gives you a beautiful, matte finish.
Before & After: Imagine a glossy, dark brown china cabinet from the 80s transformed into a beautiful, buttery cream piece with a velvety finish.
Materials: Chalk paint, a good quality paintbrush, clear wax or polycrylic sealer.
Difficulty: Easy.
Estimated Cost/Time: $30-$60 for paint and sealer, 1-2 days.
Pro Tip: If you don’t want to buy expensive chalk paint, you can make your own by mixing plaster of Paris or calcium carbonate powder with regular latex paint. It works just as well and is a fraction of the cost.
2. Bold Color Slip
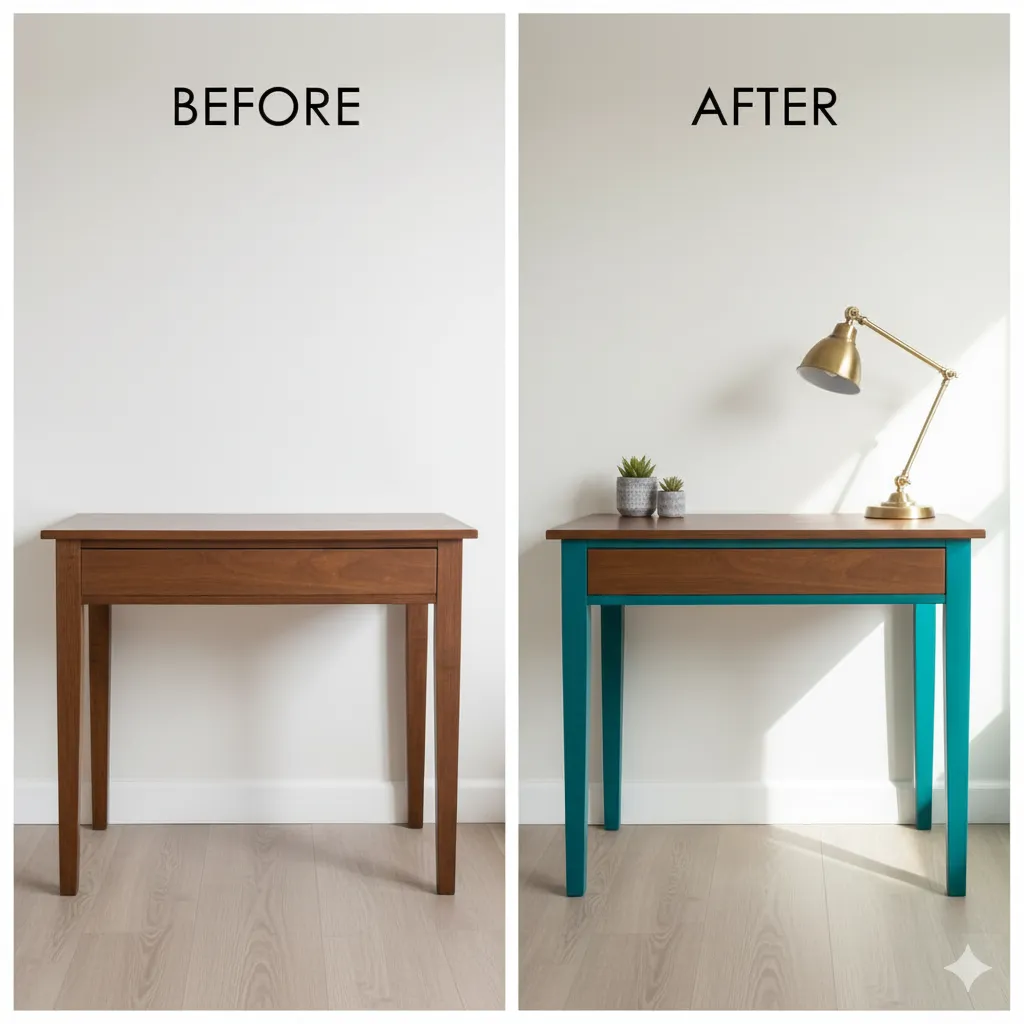
Want to add a pop of personality without committing to a full-on painted furniture makeover? Just paint the legs or the inside of the drawers a bright, bold color. This is a subtle yet powerful statement that will make people do a double-take.
Before & After: A simple wooden desk gets a modern upgrade with teal legs.
Materials: Painter’s tape, a small can of your favorite bold paint, and a brush.
Difficulty: Easy.
Estimated Cost/Time: $15-$25 for paint, a few hours.
3. Distressed / Shabby Chic Finish
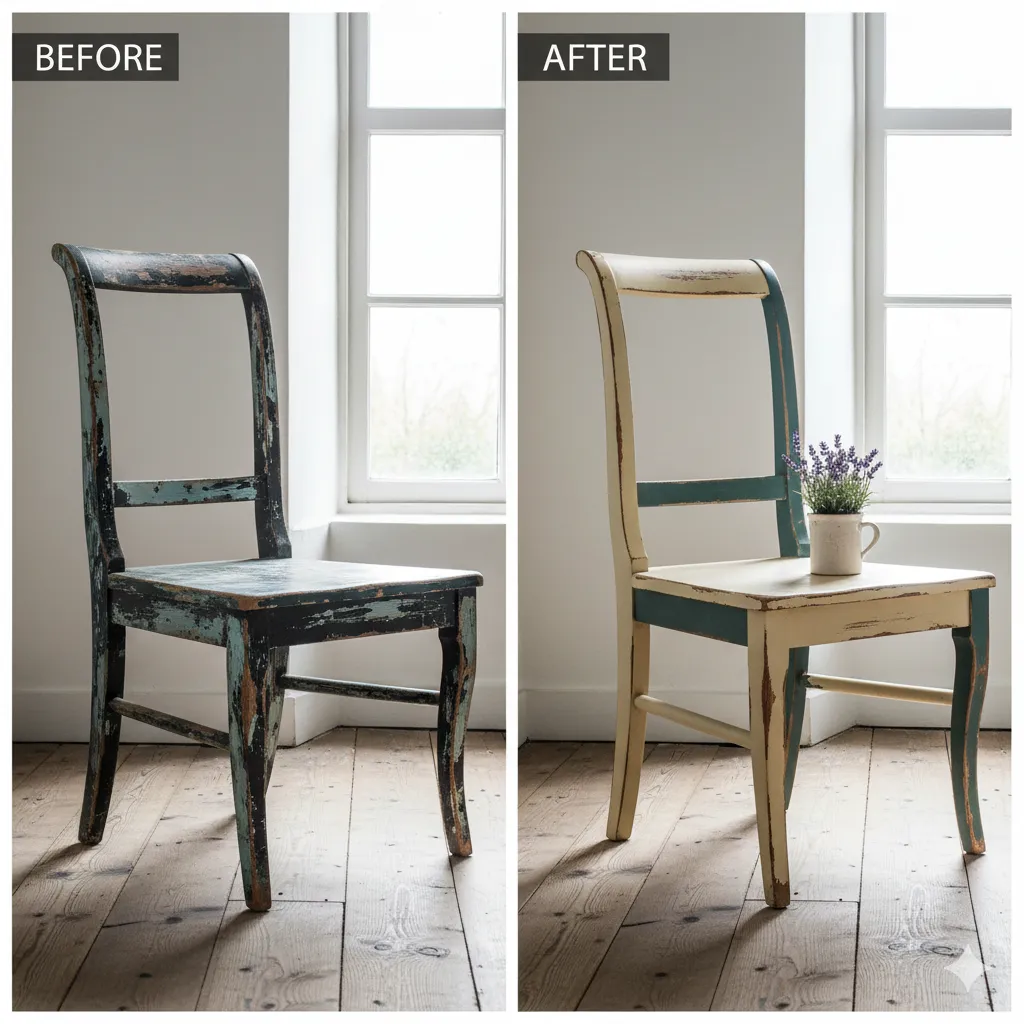
This look never goes out of style. The key to a good distressed finish is to use two different colors of paint—a darker color underneath and a lighter one on top. Then you sand through the top layer to reveal the color underneath, giving it a weathered, vintage feel.
Before & After: A beat-up old chair with layers of paint looks like it was found in a European farmhouse after getting a distressed treatment.
Materials: Two contrasting paint colors, sandpaper (various grits), and a clear wax finish.
Difficulty: Moderate.
Estimated Cost/Time: $30-$50, 1-2 days.
Pro Tip: Use a dry brush technique instead of sanding. Dip your brush in a bit of paint and then wipe most of it off on a paper towel. Then, lightly brush the paint onto the piece, focusing on edges and corners, for a soft, weathered look.
II. Repurposing & Reimagining
Sometimes, the best way to upcycle a piece of furniture is to turn it into something completely different. This is where your creativity can really shine.
4. Turn Old Drawers into Wall Shelves or Planters
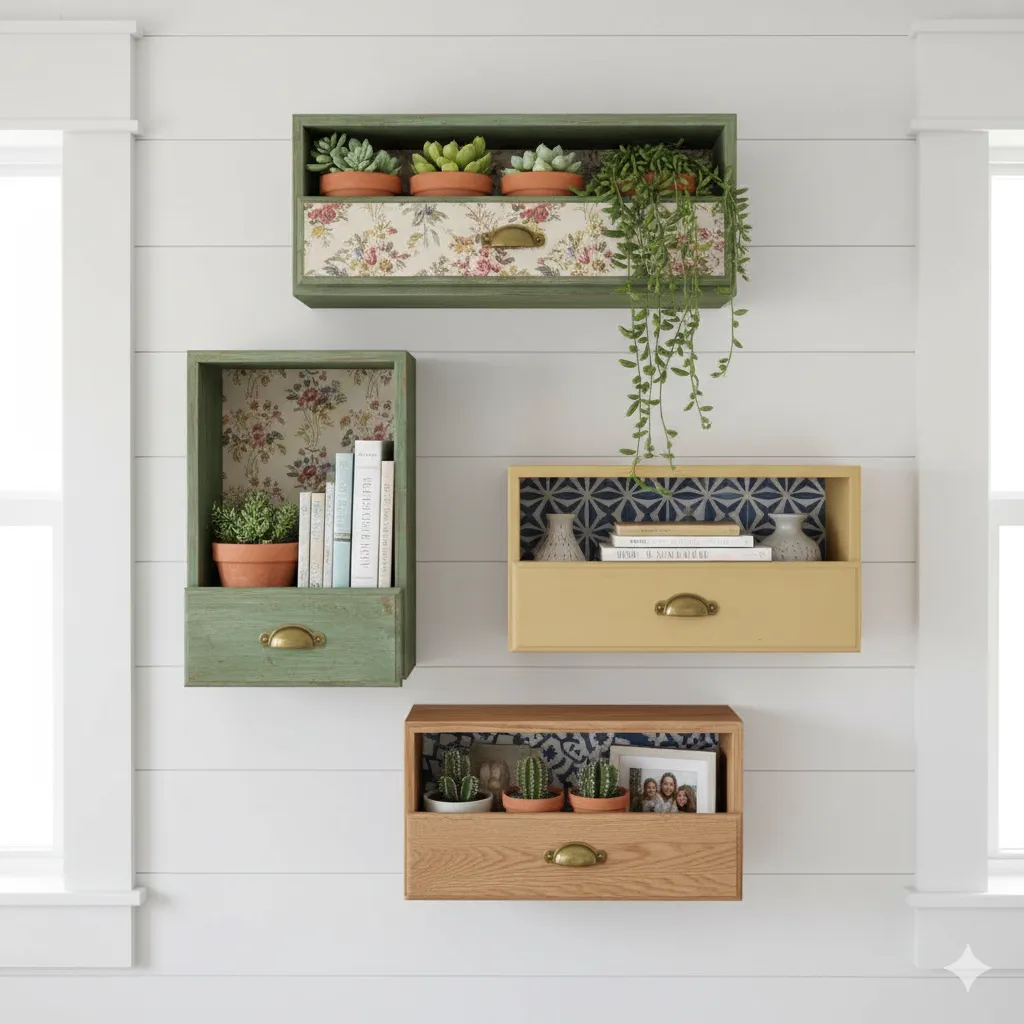
Got an old dresser with a broken frame? Don’t toss the drawers! Mount them on a wall for unique shelving. You can line the inside with some fun wallpaper or paint them a cool color. They’re perfect for holding small books, spices in the kitchen, or even as a unique planter box for succulents.
Before & After: A boring, old drawer with a broken pull gets a new life mounted on a wall.
Materials: Old drawer, screws or brackets, paint or wallpaper.
Difficulty: Easy.
Estimated Cost/Time: $10-$20, a few hours.
Pro Tip: To turn a drawer into a planter, line the inside with a plastic bag or a planter liner before adding soil. This keeps the wood from getting damaged by water.
5. Dresser into Kitchen Island or Bathroom Vanity
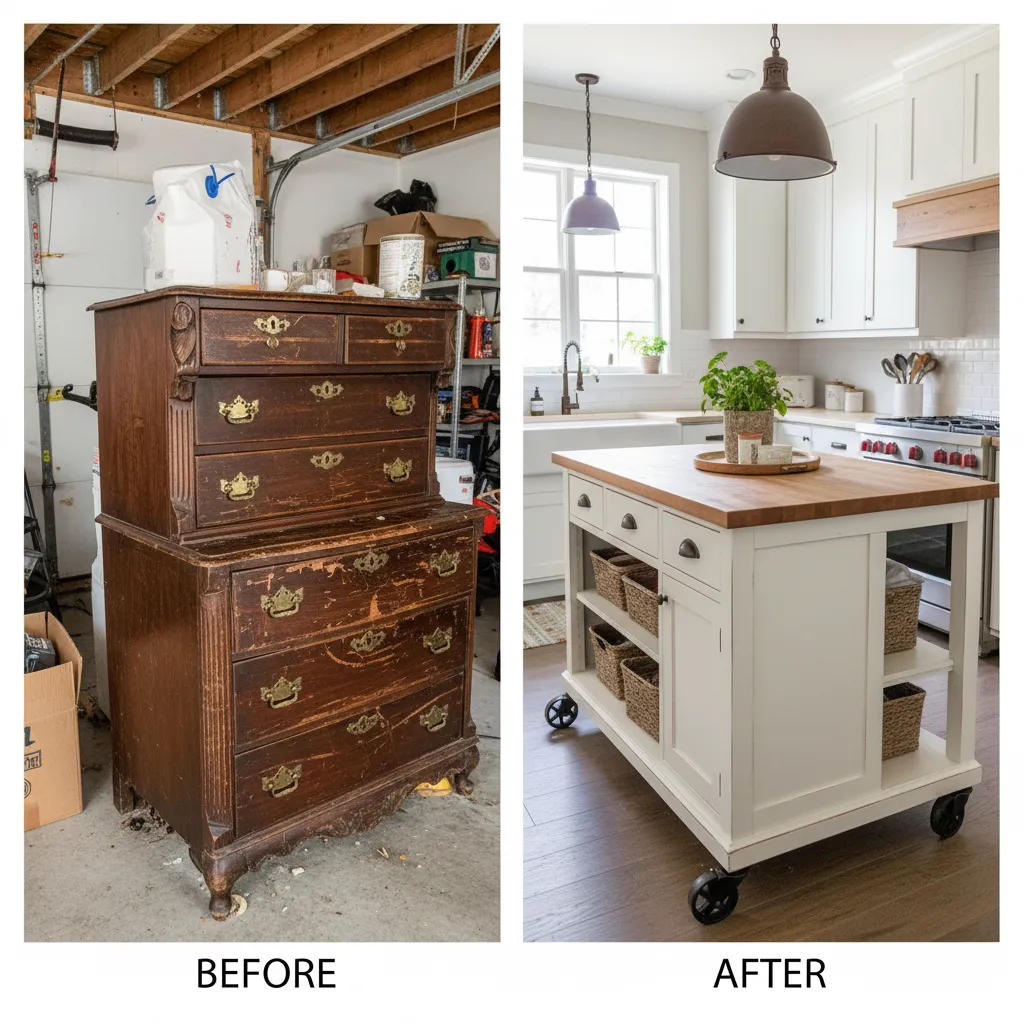
This is one of the most popular and impactful upcycled furniture ideas. An old dresser is the perfect size and height for a kitchen island. You can add a butcher block top, some casters for mobility, and boom—instant, custom island. For a bathroom vanity, you’ll just need to cut a hole for the sink and plumbing.
Before & After: A standard, vintage wooden dresser is transformed into a gorgeous, farmhouse-style kitchen island.
Materials: Dresser, butcher block or stone slab for a top, wheels (optional), sink, and plumbing fixtures.
Difficulty: Difficult.
Estimated Cost/Time: $100-$300 (depending on the top), 2-3 days.
6. Headboard to Bench
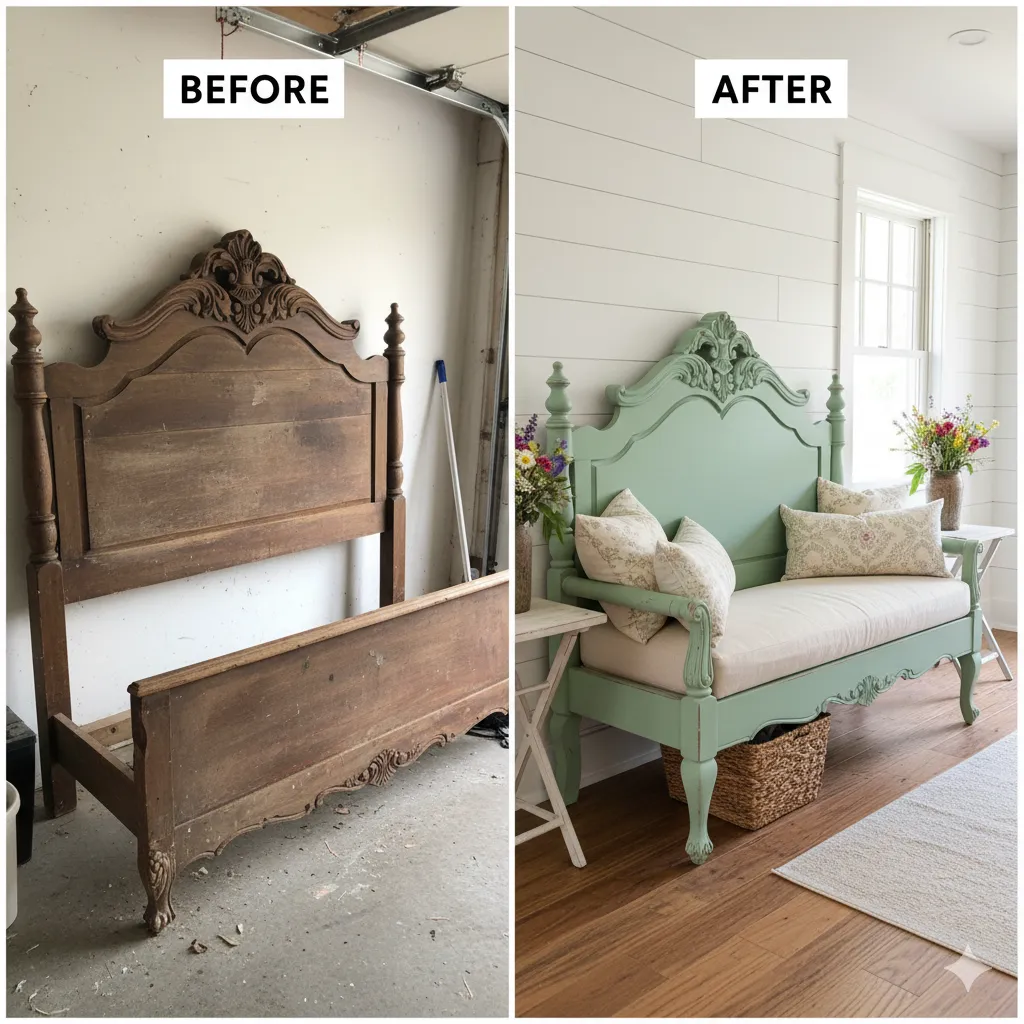
Is there anything more romantic than a repurposed headboard? Take an old wooden headboard and footboard, add a sturdy base and a comfortable seat, and you’ve got a unique bench for your entryway or porch. This looks especially cool with vintage, ornate headboards.
Before & After: A beautiful, old bed frame becomes a lovely bench.
Materials: Headboard, footboard, wood planks for the seat, paint, screws, and wood glue.
Difficulty: Moderate.
Estimated Cost/Time: $50-$100, 2 days.
Pro Tip: If the headboard is too wide for a standard bench, you can cut it in half and use the two halves as side panels, with a new backrest made from other wood.
III. Mixed Materials & Texture
Mixing materials adds a modern, custom look to any piece. It’s a great way to elevate a project and make it look like a high-end designer piece.
7. Incorporate Metal / Iron
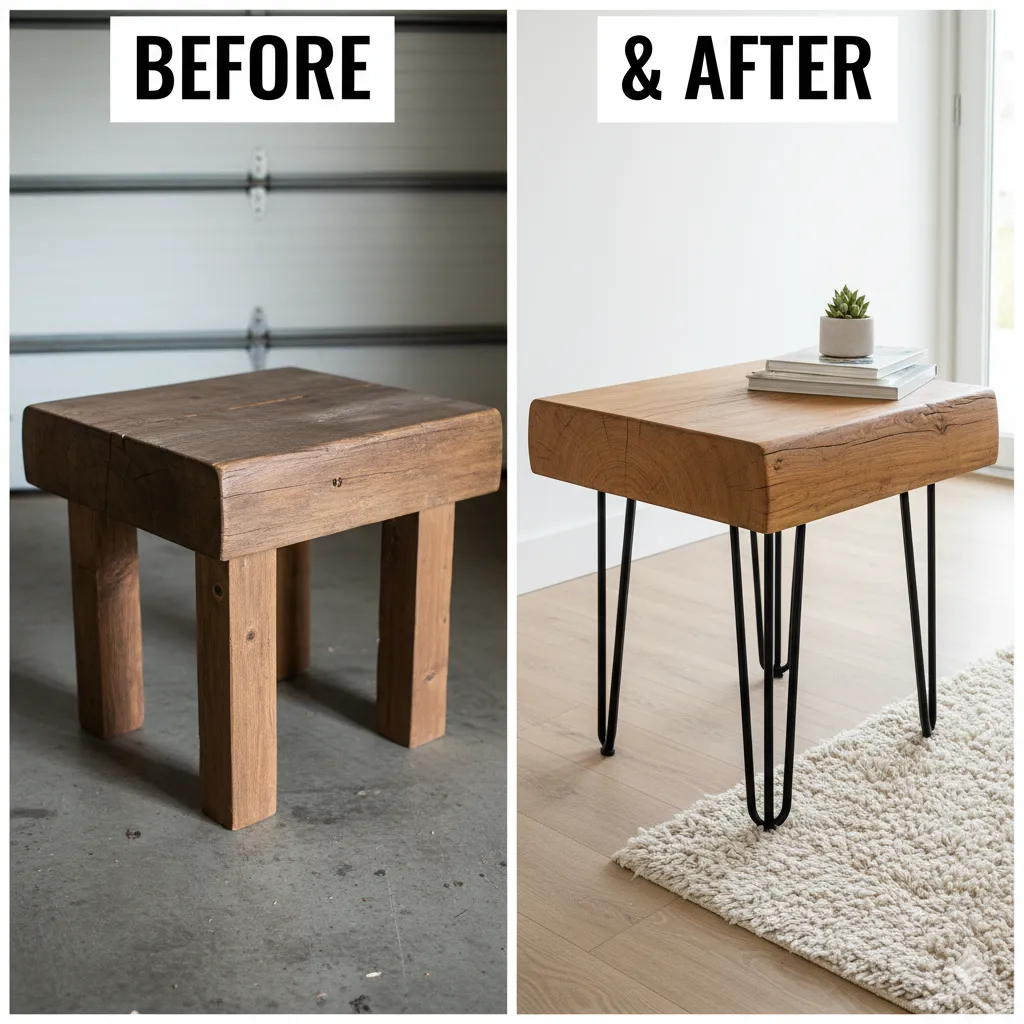
Adding hairpin legs to a slab of wood can turn it into a minimalist coffee table. Putting metal corner brackets on a chest of drawers gives it an industrial edge. These small additions completely change the feel of a piece.
Before & After: A chunky, wooden side table gets a sleek update with thin, metal hairpin legs.
Materials: Metal legs, screws, and a drill.
Difficulty: Easy.
Estimated Cost/Time: $20-$40 for legs, 1-2 hours.
Pro Tip: Before you screw in the legs, use a ruler and a pencil to mark the exact placement. A little planning here saves you from wobbly furniture later.
8. Decoupage or Wallpaper Surface
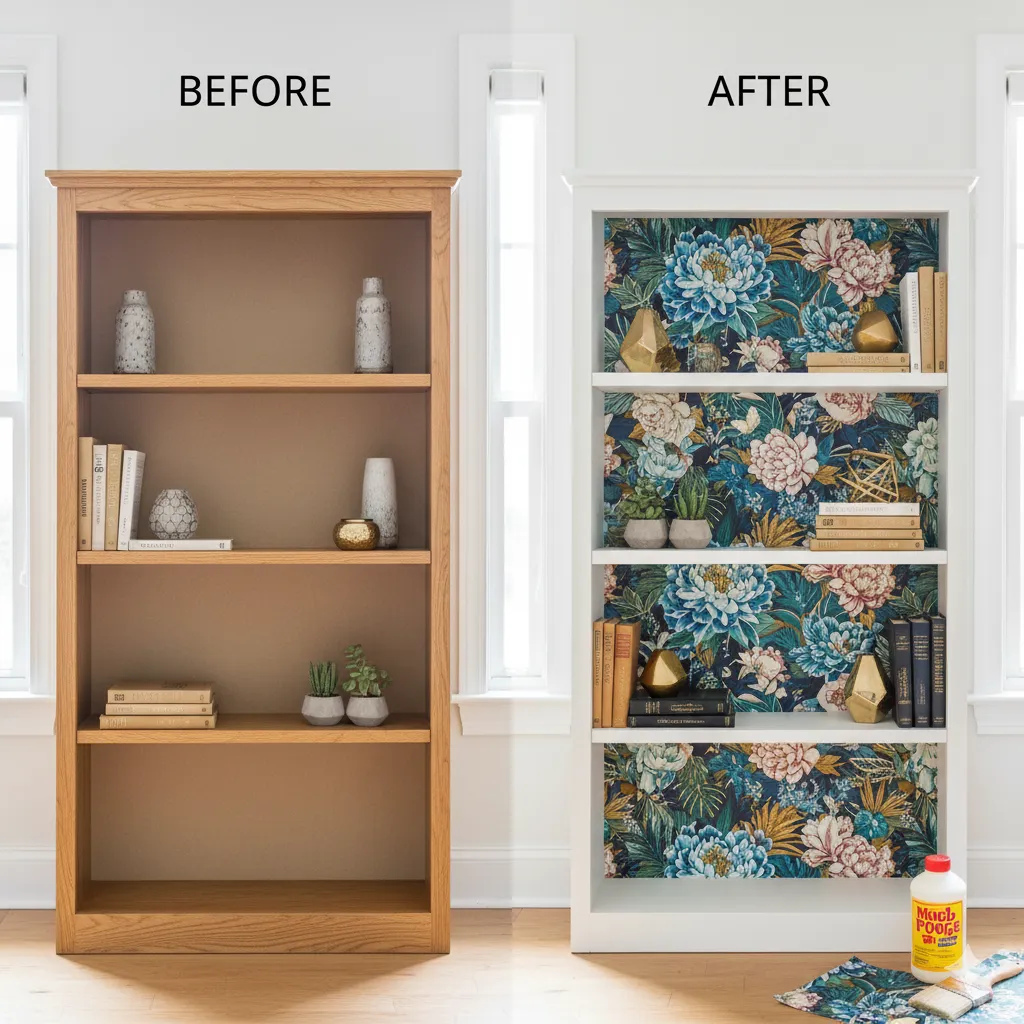
Decoupage is one of those words that sounds fancy but is super simple. It’s just gluing paper or fabric onto a surface. Want to add a pop of color to the inside of a bookshelf or a beautiful pattern to the top of a small table? Wallpaper or interesting wrapping paper is the answer.
Before & After: A plain, boring bookshelf looks like a high-end, patterned display piece.
Materials: Wallpaper or patterned paper, Mod Podge (or a similar adhesive), and a brush.
Difficulty: Easy.
Estimated Cost/Time: $20-$40, a few hours.
9. Wood + Resin / Epoxy River Table
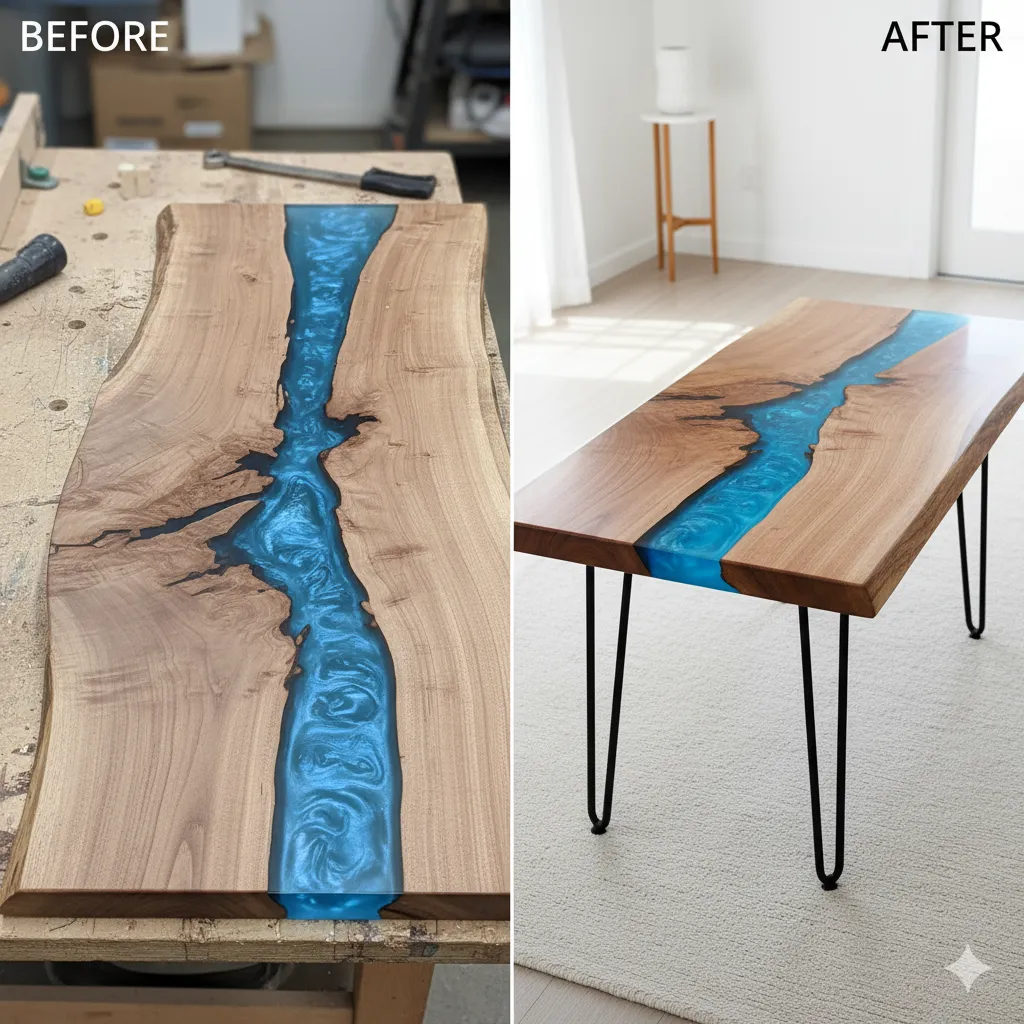
Okay, this one is for the brave. A resin or epoxy river table is a gorgeous piece of functional art. You can find a live edge slab of wood and fill the natural gaps with colored epoxy, creating a “river” down the middle. Don’t worry, you don’t need a full-on workshop for a simple version. You can do this on a small side table or coffee table with a silicone mold.
Before & After: A simple piece of wood with a crack in it becomes a stunning table with a mesmerizing blue “river” flowing through it.
Materials: Wood slab, epoxy resin, pigment, silicone mold, and a heat gun.
Difficulty: Difficult.
Estimated Cost/Time: $50-$150, 2-3 days.
Pro Tip: To avoid bubbles in your epoxy, mix it slowly and use a heat gun or a blowtorch to gently warm the surface after pouring. This helps the bubbles rise and pop.
IV. Upholstery & Soft Touches
Reupholstery can feel intimidating, but with a little practice, it’s a great way to bring new life to a piece and add a totally custom feel.
10. Reupholster Chairs or Footstools
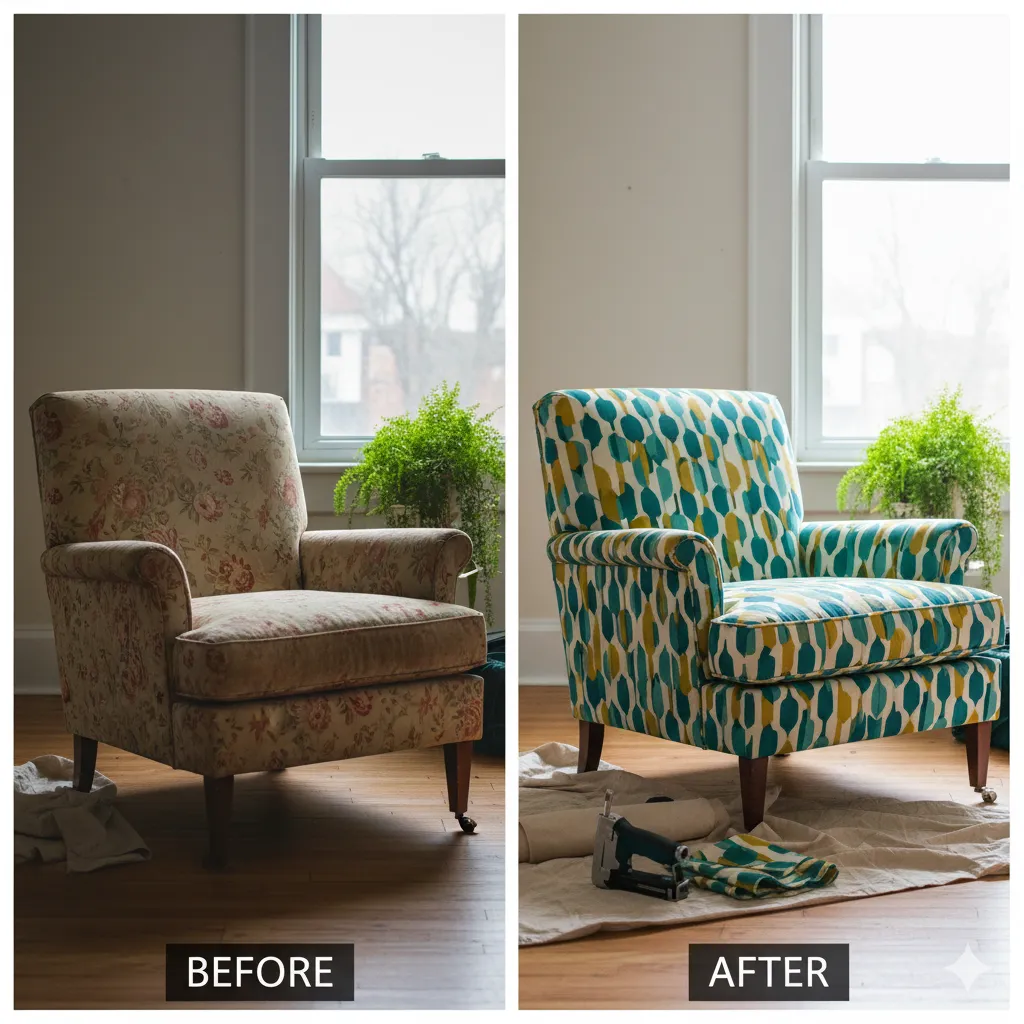
That old, wobbly chair with the dated floral fabric? A total goldmine. All you need is some new foam, batting, fabric, and a staple gun to give it a complete facelift. You can go for a bold, geometric pattern or a classic linen.
Before & After: A chair with faded, drab fabric is transformed with a bright, fun new pattern.
Materials: Fabric, batting, a staple gun, and pliers.
Difficulty: Moderate.
Estimated Cost/Time: $20-$50, a few hours.
Pro Tip: For a quick and easy chair seat makeover, trace the old seat on the new fabric, cut it out, and staple it directly over the old fabric. You can always remove the old layer later.
11. Add Cushions, Tufting, Nail-Head Trim Accents
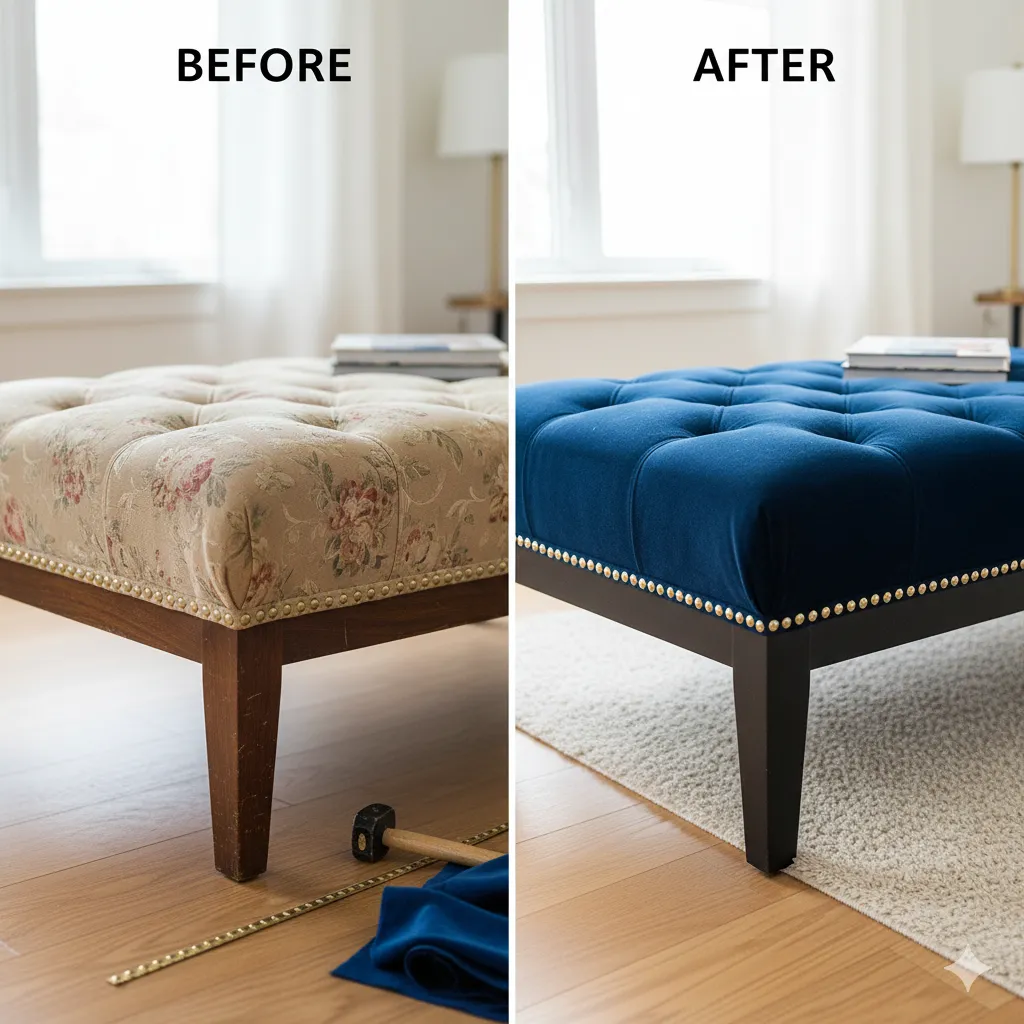
Small details make a big difference. Add some cushions to an old wooden bench for comfort, tuft a headboard for a luxurious feel, or use nail-head trim to give a dining chair an expensive look. These are all things you can do without a lot of experience.
Before & After: A plain ottoman gets a serious upgrade with a tufted top and nail-head trim around the base.
Materials: Nail-head trim, hammer, fabric, and foam.
Difficulty: Easy to Moderate.
Estimated Cost/Time: $10-$30, a few hours.
V. Small Scale / Accent Pieces
Don’t want to tackle a huge dresser? Start with something small. Small-scale pieces are the perfect way to test out new techniques and build your confidence.
12. Side Table Makeovers
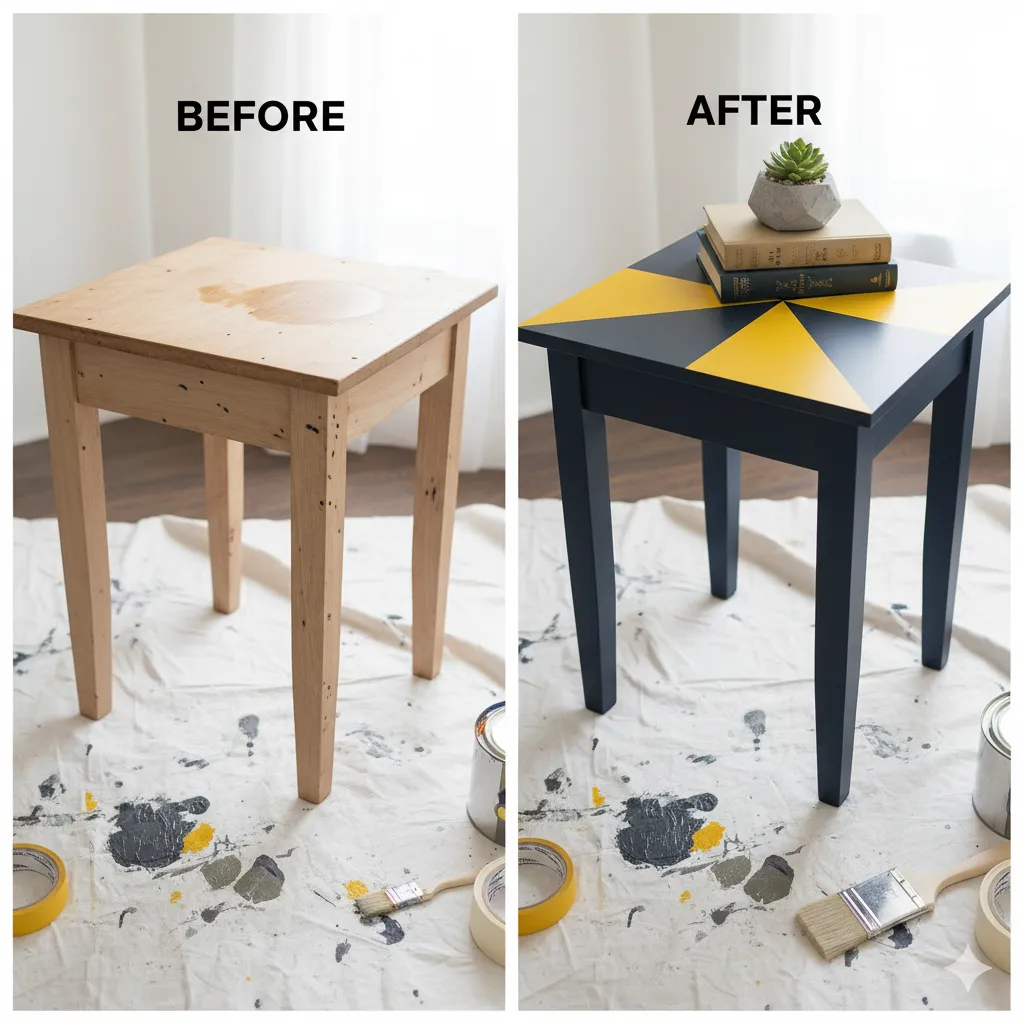
A little side table is a perfect canvas for your first upcycled furniture project. Paint it a bright color, add a geometric design with painter’s tape, or even try a stencil. The possibilities are endless.
Before & After: A plain, wooden side table with scuffs and dings is given a new look with a bold, two-tone geometric pattern.
Materials: Painter’s tape, paint, and a stencil.
Difficulty: Easy.
Estimated Cost/Time: $15-$30, a few hours.
Pro Tip: For perfect, clean lines with painter’s tape, paint a thin layer of your base color over the edges of the tape first. This seals the tape and prevents any bleeding when you apply your top color.
13. Upcycled Nightstands
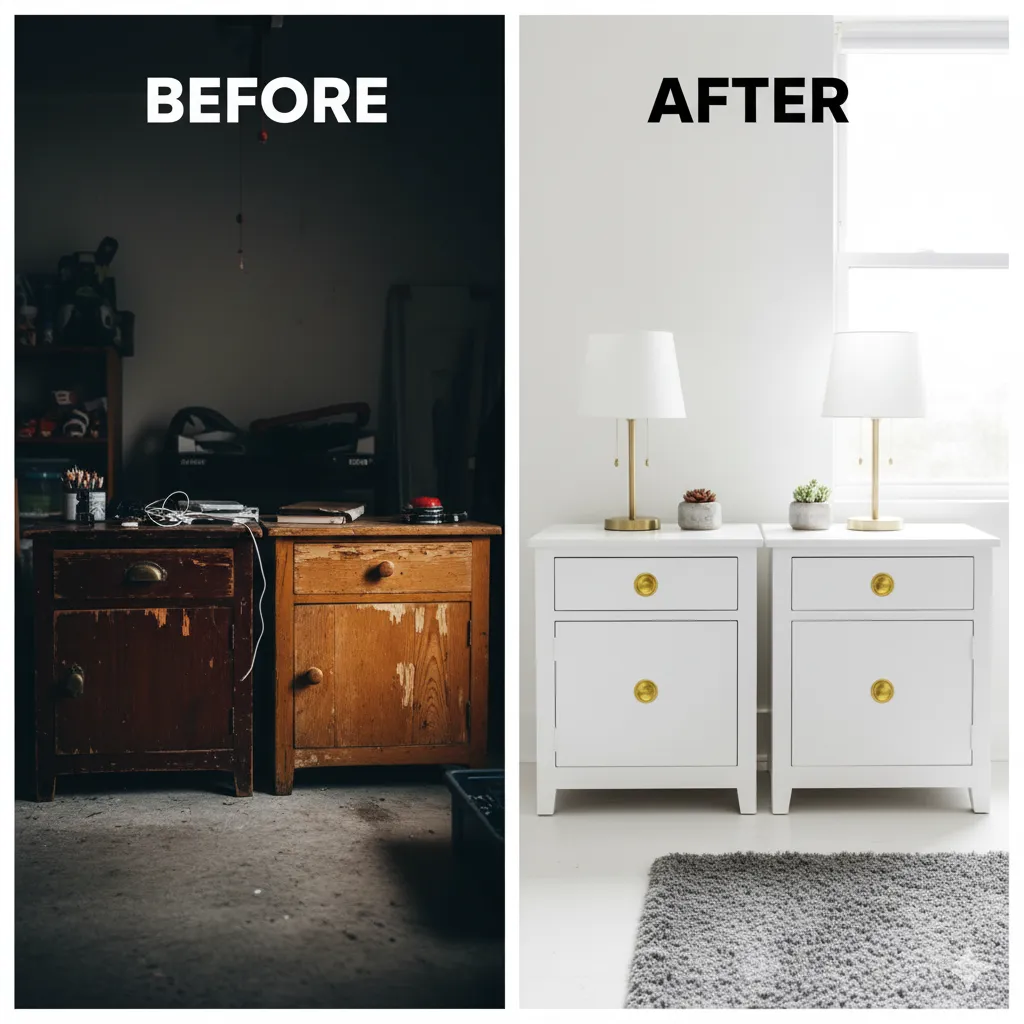
Nightstands are often small, boring, and a bit beat up. Give them a glow-up with a fresh coat of paint, new hardware, and maybe a small decorative addition like a decorative trim. A little effort goes a long way.
Before & After: A pair of mismatched nightstands becomes a cohesive set with a new coat of paint and some new, gold-tone knobs.
Materials: Paint, new knobs or pulls, sandpaper.
Difficulty: Easy.
Estimated Cost/Time: $20-$50, 1 day.
VI. Outdoor & Garden Furniture Upcycling
Don’t forget about your outdoor spaces! They deserve some love too. Old furniture that might not work inside can be perfect for the outdoors with a little weatherproofing.
14. Pallet Furniture: Benches, Outdoor Seating
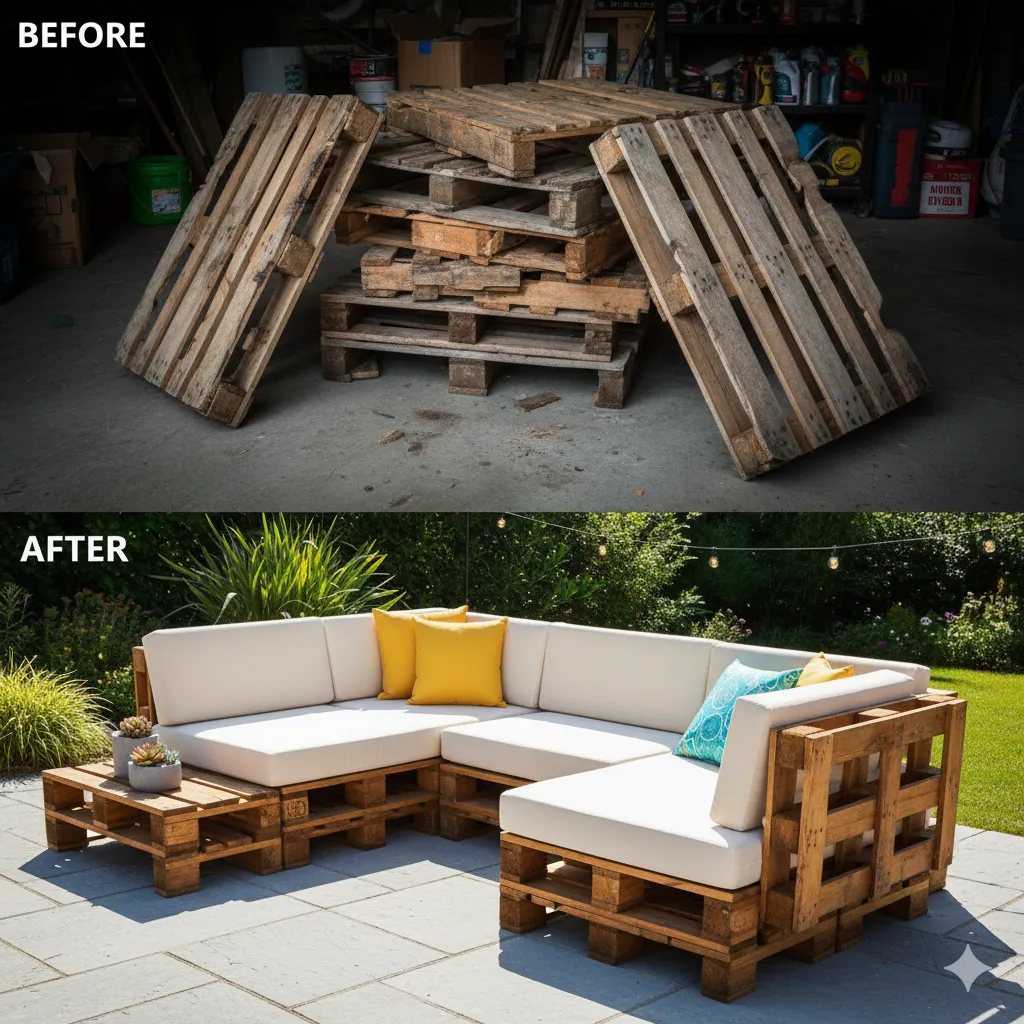
Pallets are cheap, sometimes even free, and are an incredible resource for outdoor furniture. You can sand them down, stain them, and use them to create a modular outdoor sofa or a simple bench. Just add some cushions, and you’ve got an amazing new patio setup.
Before & After: Rough, dirty wood pallets are transformed into a sleek and modern sectional for a patio.
Materials: Pallets, sandpaper, paint or wood stain, and outdoor cushions.
Difficulty: Moderate.
Estimated Cost/Time: $30-$100, 1-2 days.
Pro Tip: Before you use any pallet, make sure it’s safe. Look for the “HT” stamp, which means it has been heat-treated and not treated with harmful chemicals.
15. Upcycle Old Metal Furniture
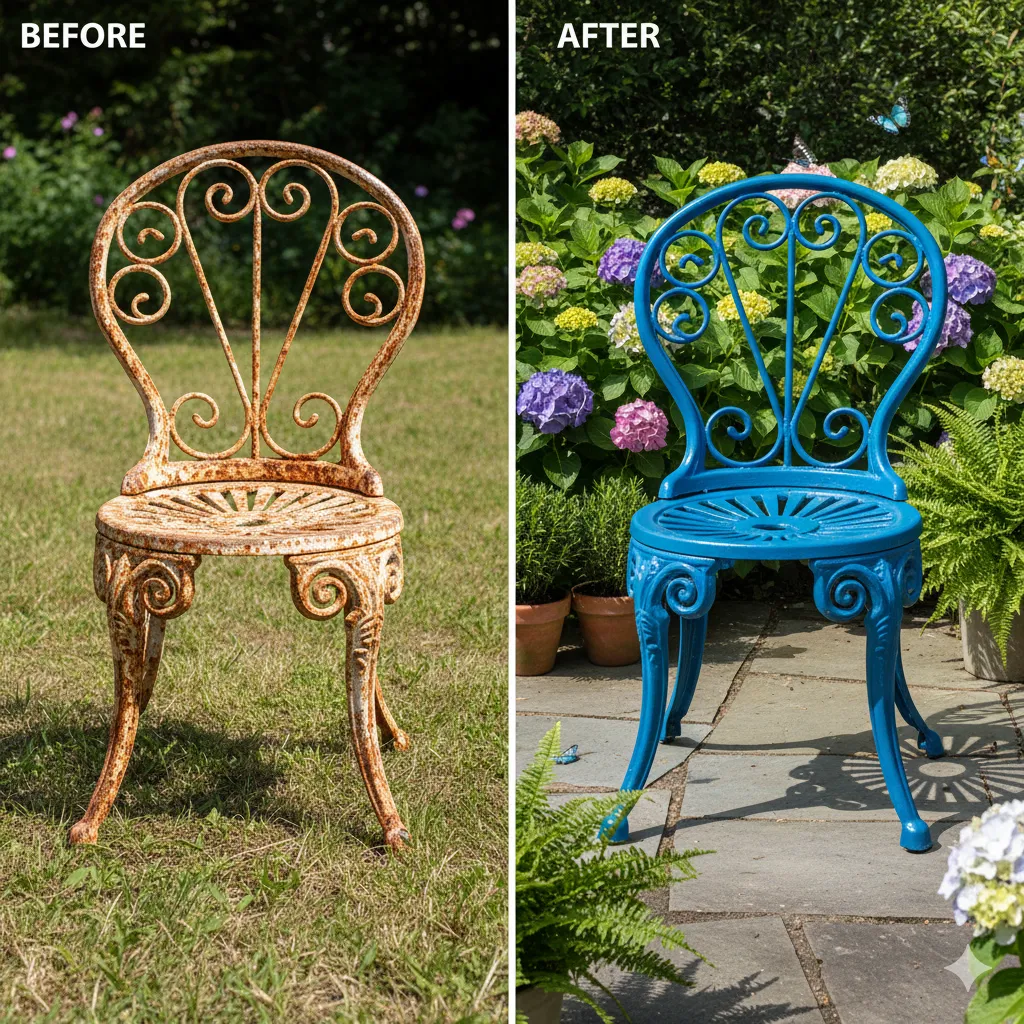
Wrought iron chairs and tables can get rusty and look sad over time. But with a wire brush and some rust-resistant spray paint, you can bring them back to life. A bright color like yellow or teal can really pop against the green of a garden.
Before & After: A rusty, old wrought iron chair is given a fresh coat of bright, blue paint.
Materials: Wire brush, sandpaper, and rust-resistant spray paint.
Difficulty: Easy.
Estimated Cost/Time: $20-$40, a few hours.
Pro Tip: Clean the metal thoroughly with a degreaser and a wire brush to remove all rust. If you miss a spot, the rust will come back in no time. For real. I learned that the hard way.
You’ll Wish You Tried One of These Sooner
I know, that’s a lot of ideas. But which one is the easiest to start with? Honestly, anything from the Paint & Finish section is a solid choice. A simple chalk paint makeover or a bold color on the legs of a small table is a fantastic way to get your feet wet. Just pick one piece, commit to it, and enjoy the process. Don’t get me wrong, you’ll probably mess up a little, but that’s part of the fun. And the results? Totally worth it.
So, go ahead. Open that garage door. Head to the back of the thrift store. That tired old piece of furniture is begging for a new life, and you’re just the person to give it to them. Don’t let good furniture go to waste. I’m telling you, you’ll look at that finished project and wonder why you didn’t start sooner.
Now that you’re inspired, what are you waiting for? Let me know which of these upcycled furniture ideas you’re going to try first! You could even share your projects on social media.
