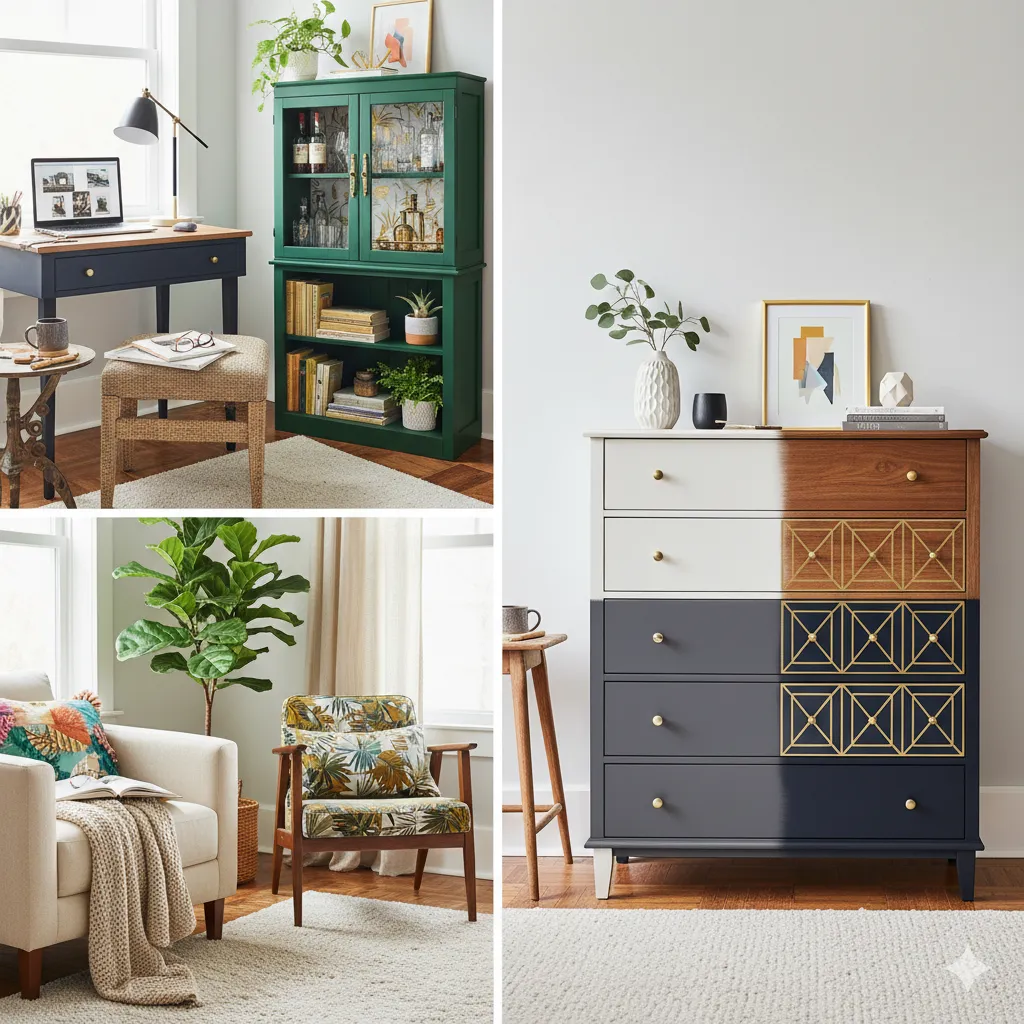
You know that feeling. You’re wandering the aisles of a thrift store, and most people are just walking past the sad, forgotten furniture. The old, chipped dresser with the wobbly leg. The ornate wooden chair with the stained cushion. But you? You see something else. You see the hidden potential, the solid bones, the piece waiting for a little love and a new life. Trust me, I get it. I’ve rescued more sad-looking pieces from dusty corners than I can count.
This obsession with transforming what others discard isn’t just a fun hobby; it’s a whole movement. A DIY furniture flip is the ultimate triple threat: it’s super budget-friendly, incredibly sustainable, and lets you inject a ton of personality and uniqueness into your home. Forget mass-produced stuff that everyone else has. With a few tools and a little creativity, you can create something truly yours.
I’m not going to give you a bunch of generic tips you can find anywhere. I’m giving you the real deal. In this guide, I’ll walk you through 17 inspiring flips—pieces I’ve done myself or have seen executed brilliantly—and give you the straight scoop on what to look for, the supplies you need, and even how to photograph your finished piece so it gets all the love on Pinterest. Because let’s be real, a good thrift find + a great flip = a viral pin just waiting to happen.
Now for the good stuff. Here are some of my favorite upcycled furniture projects, designed to give you a ton of easy thrift store furniture flip ideas and some serious inspiration.
1. Two-Tone Painted Dresser
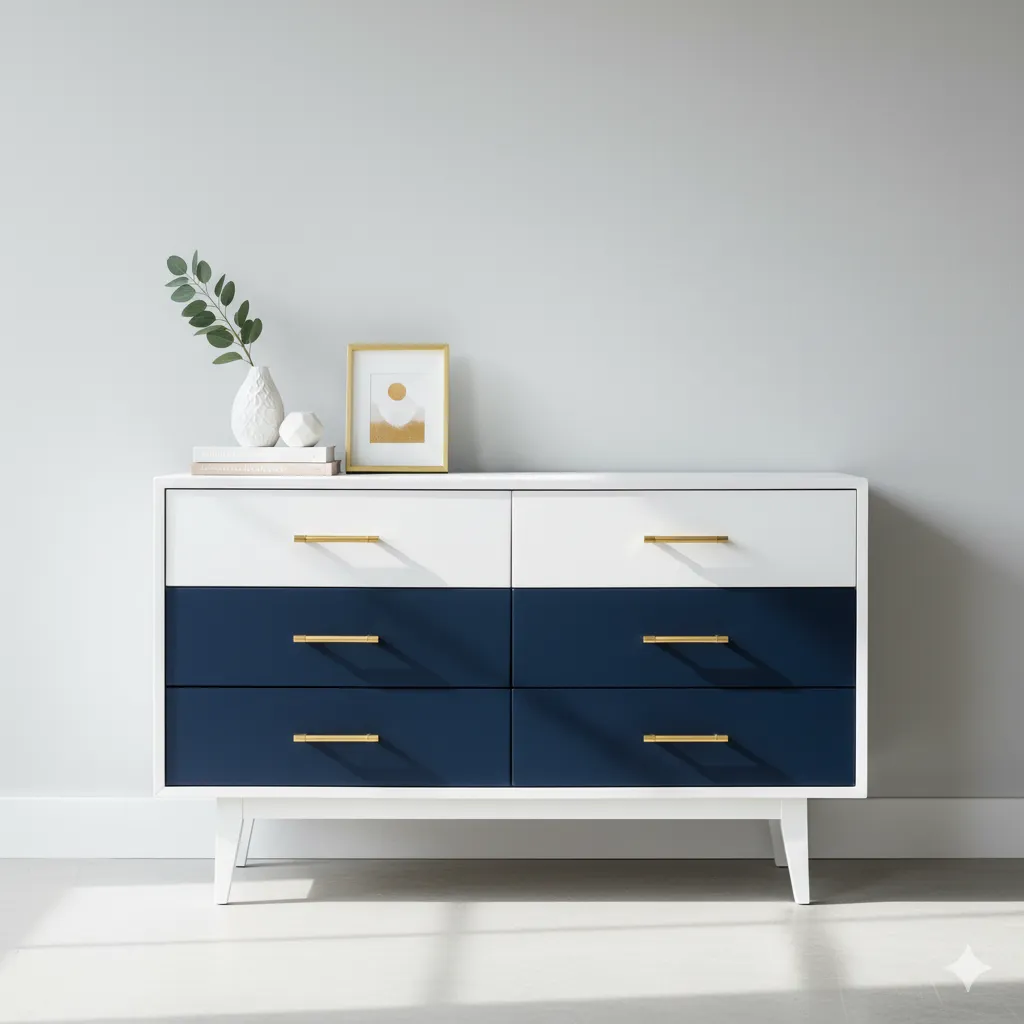
- Before: A dark brown, outdated dresser from the 80s.
- After: The body is painted a crisp white, and the drawer fronts are a deep navy.
- The original wooden knobs are replaced with sleek, modern brass pulls.
- Cost: Under $50 for a can of white paint, a sample of navy paint, and new hardware.
- Time: 6-8 hours.
- Challenges: Getting a clean line where the two colors meet. Overcome this with high-quality painter’s tape and pressing it down firmly.
- Pinterest Tip: Stage it against a light wall with a simple vase and a framed print on top for a clean, minimalist shot.
2. Mid-Century Chair Reupholstered
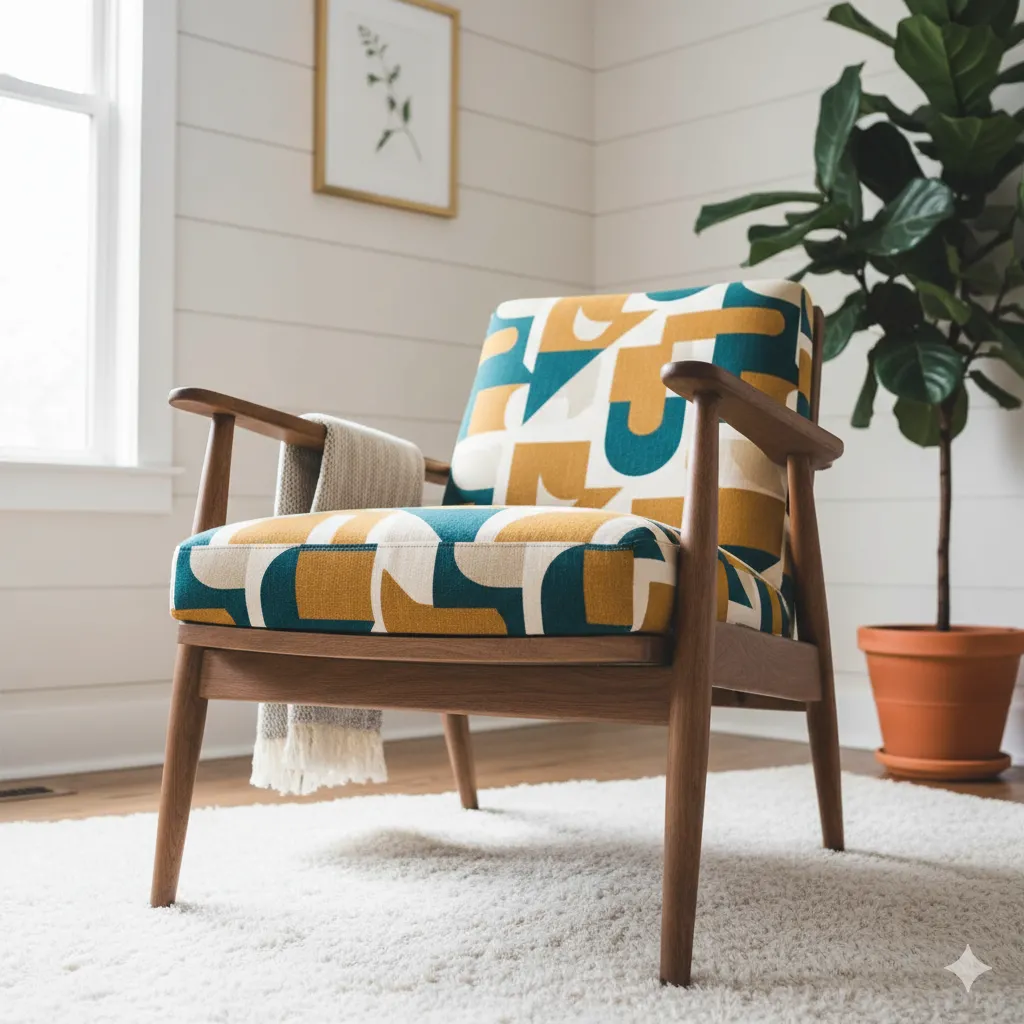
- Before: A classic mid-century chair with good bones but a horrible, stained cushion.
- After: The wood is sanded and stained a lighter walnut color.
- The cushion is reupholstered in a bold, geometric fabric.
- Cost: $40-$60 for fabric and stain.
- Time: 4-5 hours.
- Challenges: Getting the fabric pulled taut and stapled neatly. Just take your time and pull hard.
- Pinterest Tip: Take a shot from a low angle to show off the chair’s lines.
3. Rustic Farmhouse Side Table
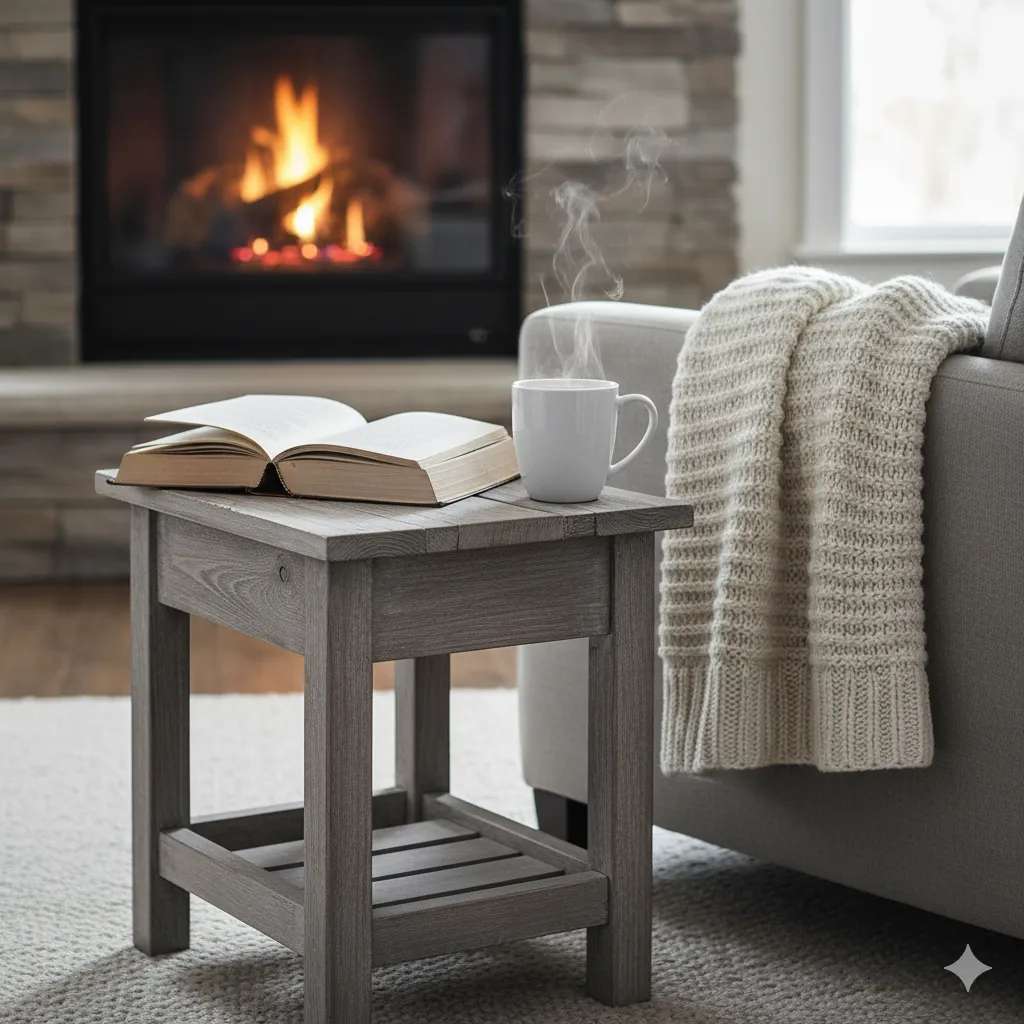
- Before: A small, beat-up pine side table with a few nicks.
- After: The piece is lightly sanded and then stained with a weathered grey or dark walnut stain to give it a rustic feel.
- Cost: $15 for a can of stain.
- Time: 2-3 hours.
- Challenges: Getting an even stain. Wipe on, then wipe off excess with a clean cloth.
- Pinterest Tip: Stage it next to a cozy armchair with a book and a mug of coffee on top.
4. Chalk Paint & Distressing Piece
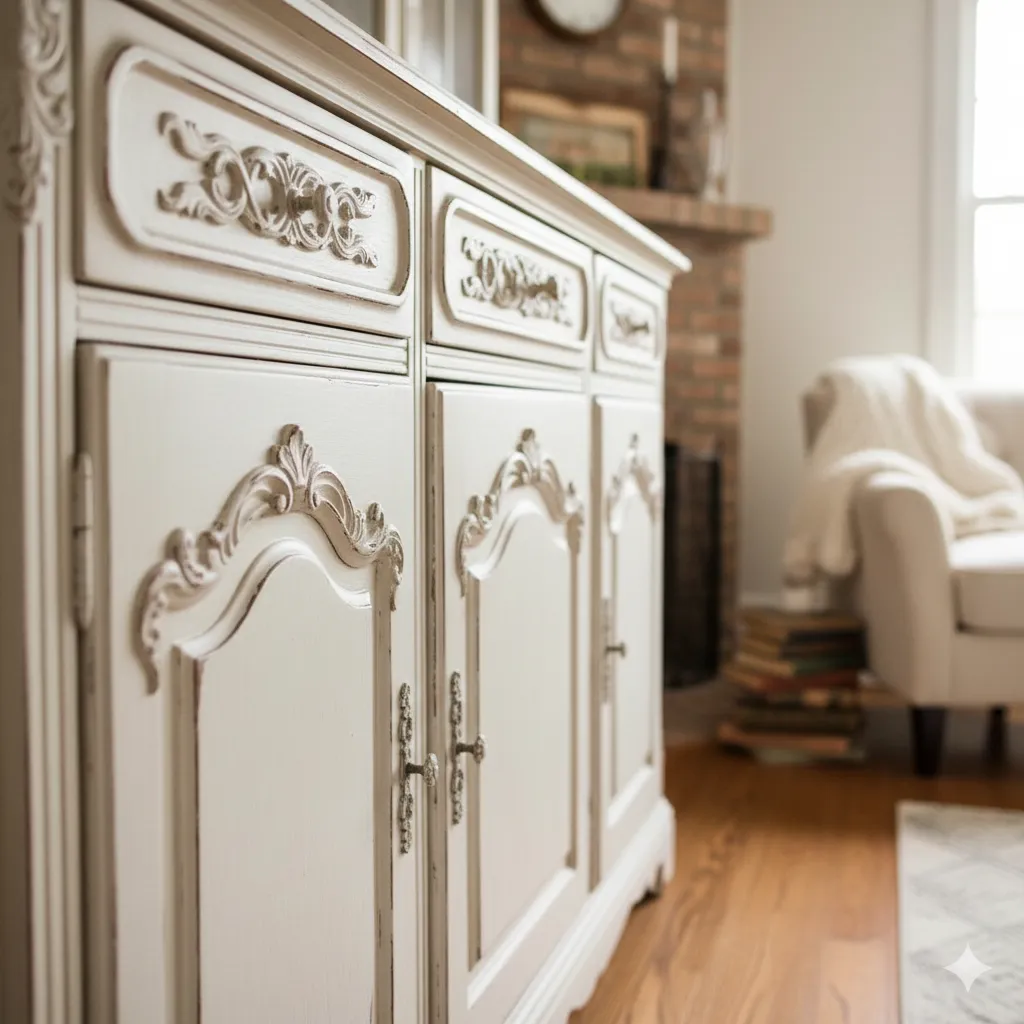
- Before: A large, ornate vintage cabinet.
- After: Painted with a creamy off-white chalk paint.
- Once dry, sand the edges and raised details to reveal the dark wood underneath for a distressed, time-worn look.
- Cost: $30-$40 for a can of chalk paint and a wax sealant.
- Time: 5-6 hours.
- Challenges: Knowing when to stop distressing. Less is more, so start small and see how it looks.
- Pinterest Tip: A close-up shot of the distressed edges and ornate details will get all the attention.
5. Graphic or Stencil Accent on Drawers
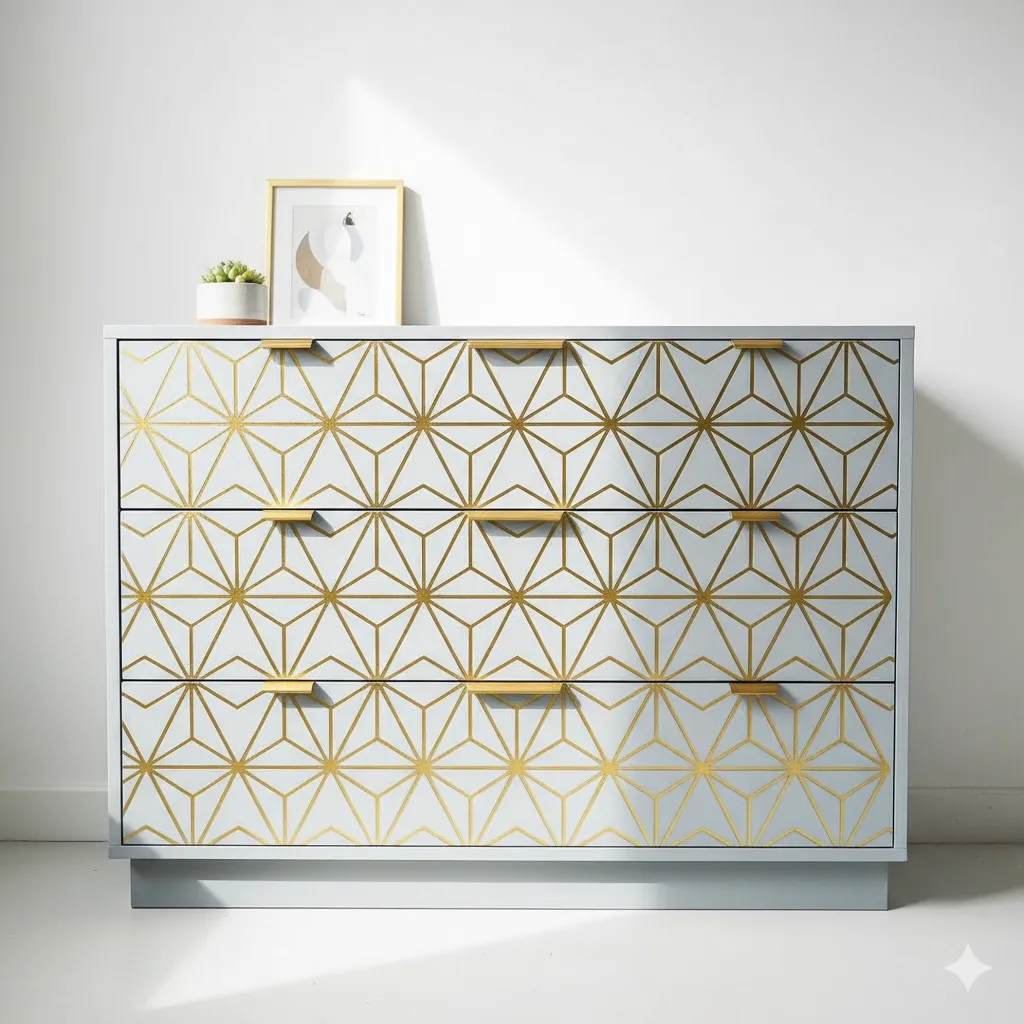
- Before: A plain, boring dresser.
- After: The body is painted a solid color (like light gray).
- A stencil is used to create a large, geometric pattern on the drawer fronts in a contrasting color (like gold or black).
- Cost: $30-$50 depending on the paint and stencil.
- Time: 7-9 hours, including drying time between layers.
- Challenges: The stencil bleeding. Use a small amount of paint and a stencil brush, dabbing straight up and down.
- Pinterest Tip: A straight-on shot of the dresser to show off the bold pattern.
6. Metallic Hardware Transformation
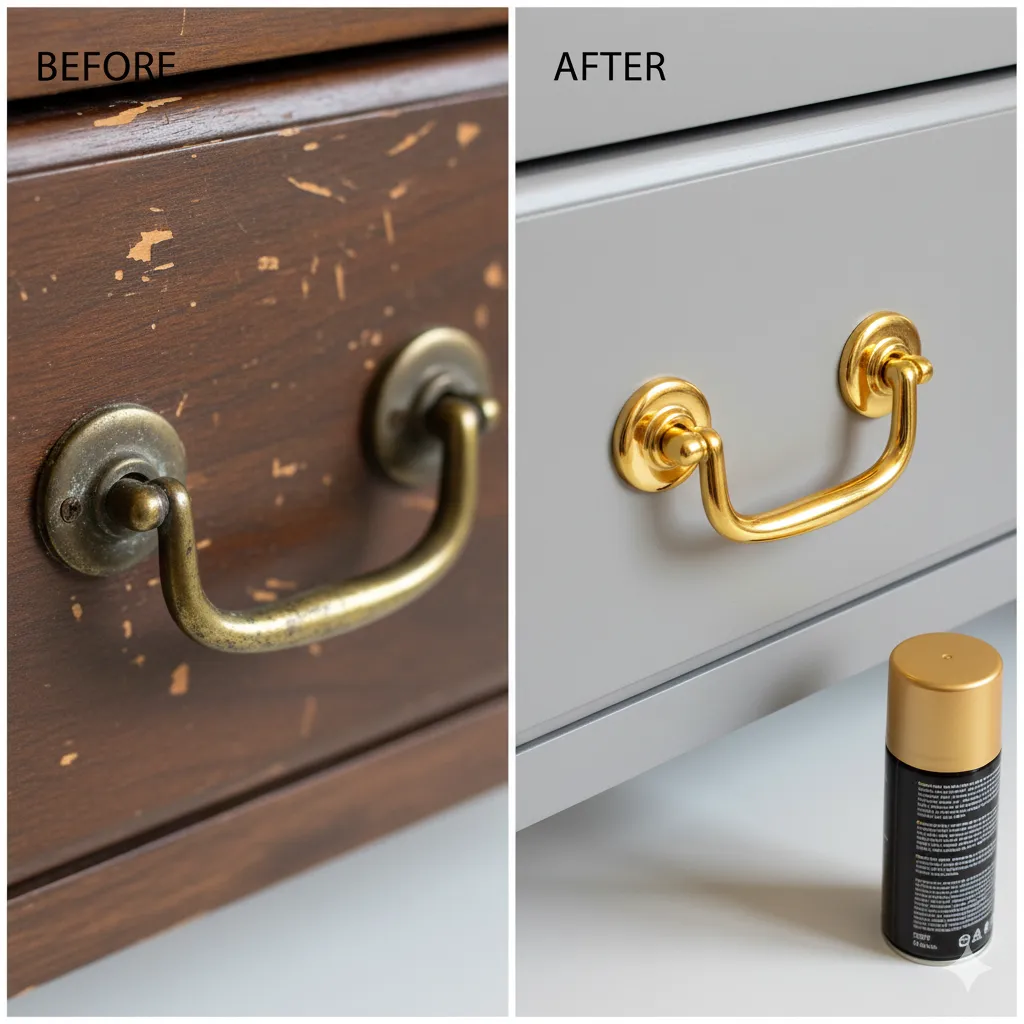
- Before: An old chest with dull, brass-looking hardware.
- After: The hardware is removed, cleaned, and spray-painted with a shiny metallic gold or copper.
- Cost: $5 for a can of metallic spray paint.
- Time: 1-2 hours.
- Challenges: Getting an even coat. Use multiple light coats instead of one heavy one.
- Pinterest Tip: A detail shot of the hardware and a “before” shot of the old hardware.
7. Painted Wicker Chair
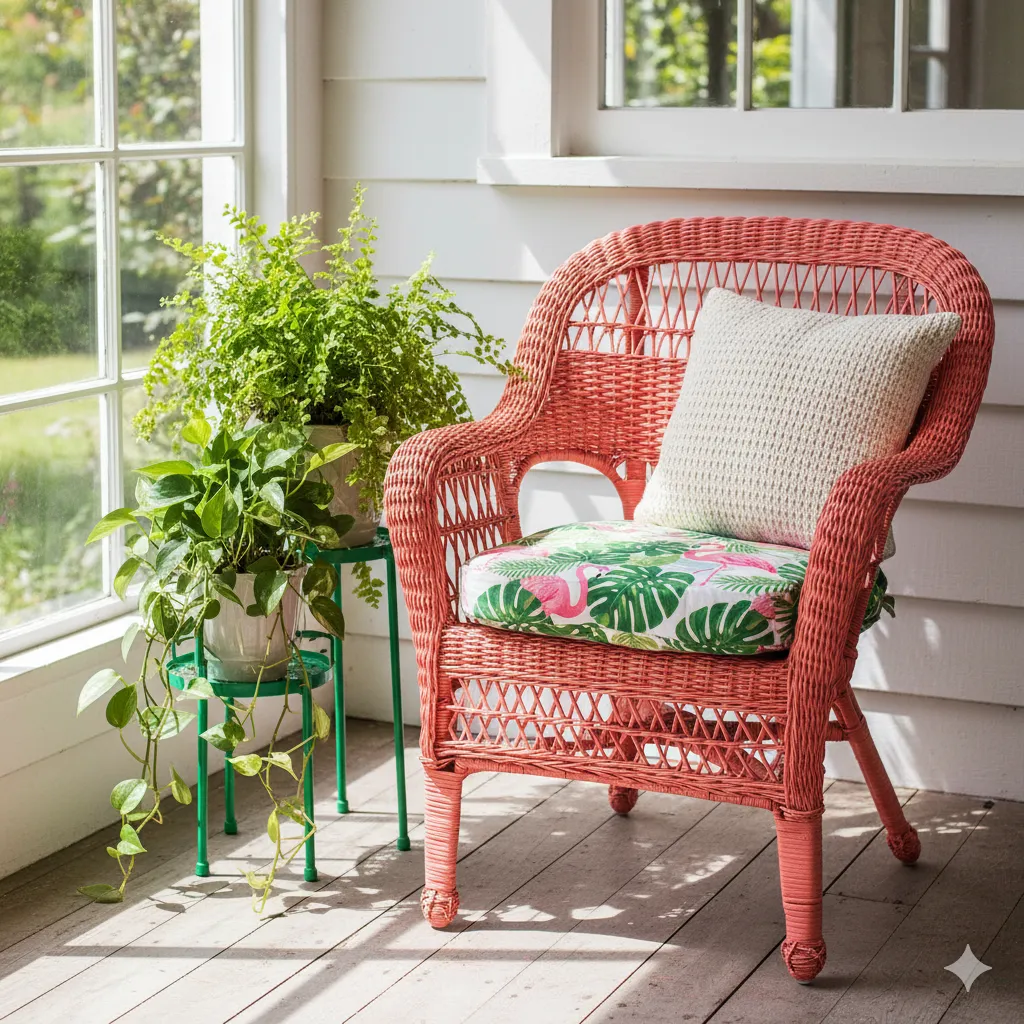
- Before: A dirty, brown wicker chair.
- After: Spray-painted a crisp white or a vibrant color like coral.
- Add a new cushion with a fun pattern.
- Cost: $20-$30 for spray paint and fabric.
- Time: 3-4 hours.
- Challenges: Getting paint into all the little crevices of the wicker.
- Pinterest Tip: Place it on a porch or in a corner with a fun throw pillow.
8. Ombre Dresser
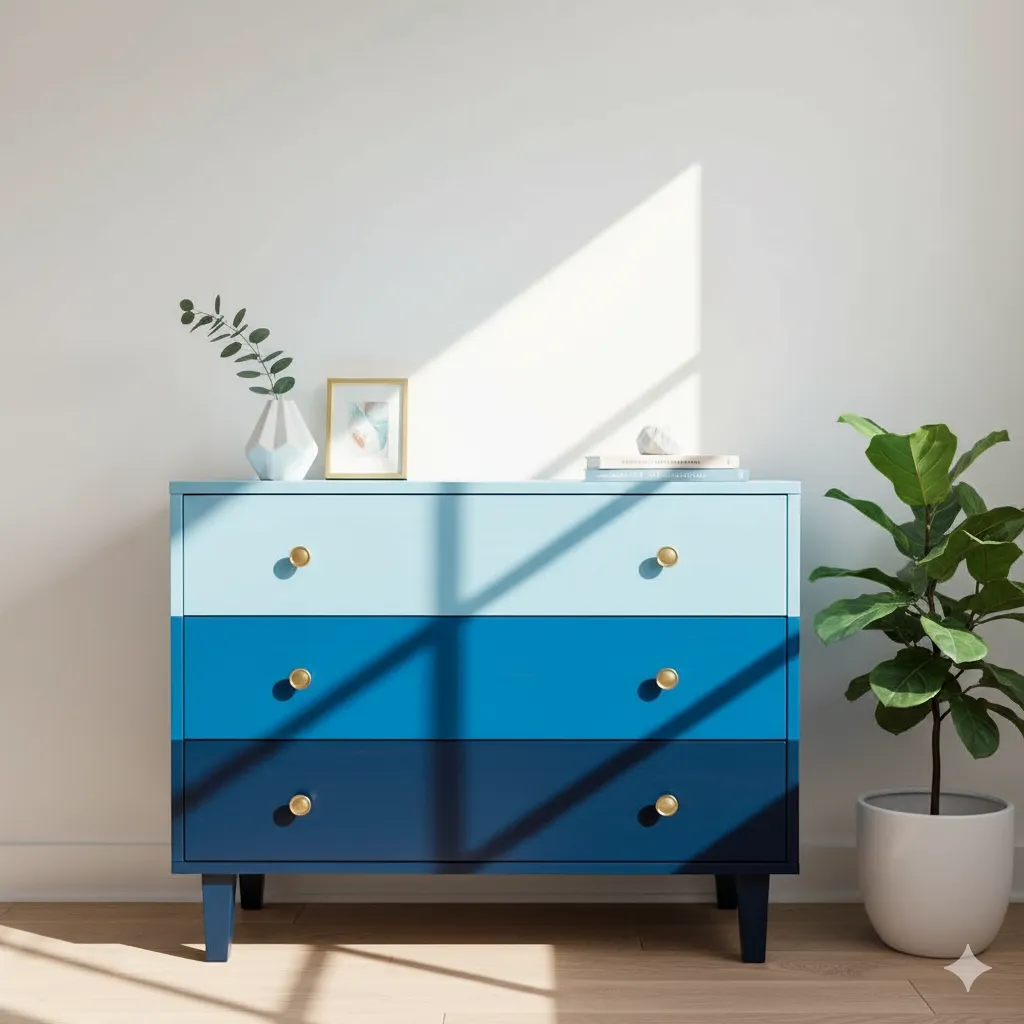
- Before: A basic wooden dresser.
- After: Each drawer is painted a different shade of the same color, going from light to dark.
- Cost: $30-$40 for a few shades of paint.
- Time: 6-8 hours.
- Challenges: Mixing the right shades and getting smooth transitions.
- Pinterest Tip: A straight-on shot showing the gradient of the colors.
9. Wood Top, Painted Bottom Desk
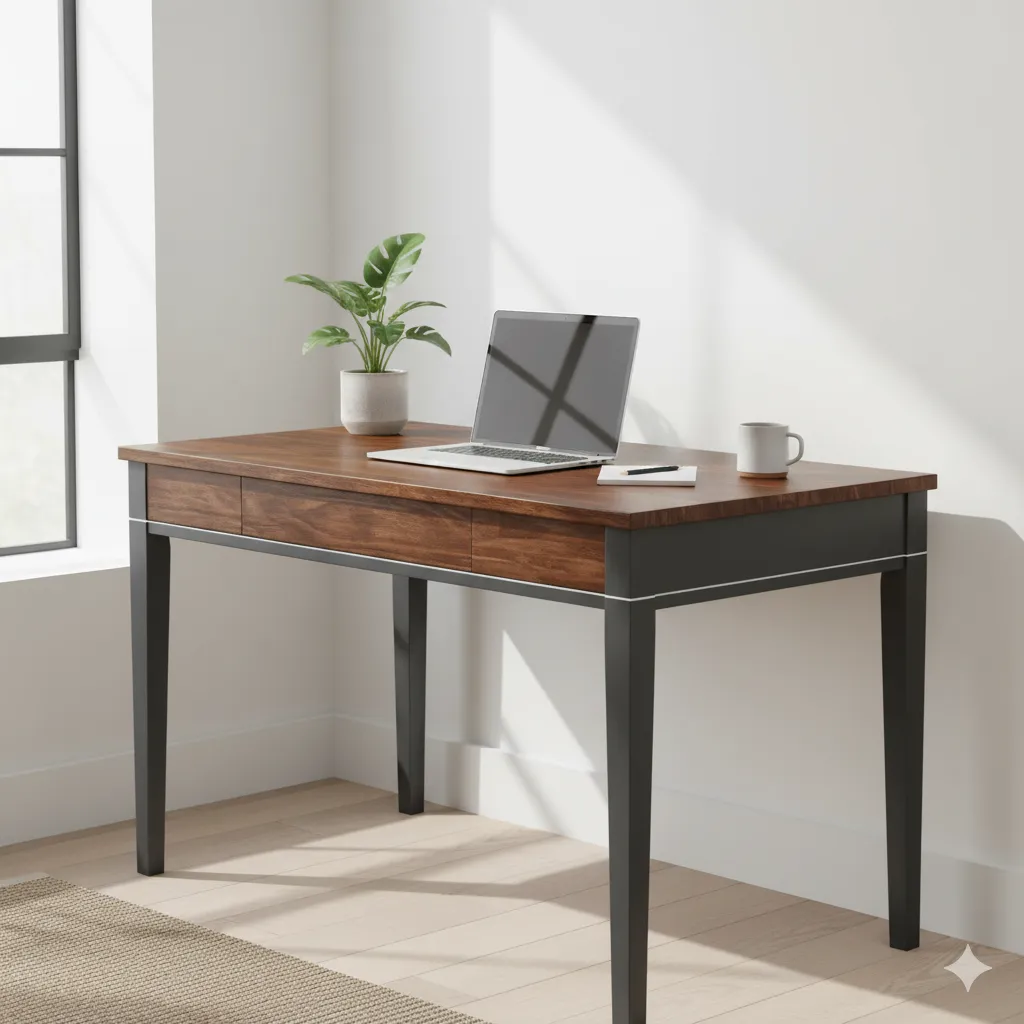
- Before: A flimsy-looking old desk.
- After: The top is sanded down and stained to a beautiful dark wood finish.
- The legs and body are painted a deep charcoal gray.
- Cost: $30-$50 for stain, paint, and brushes.
- Time: 5-6 hours.
- Challenges: Getting a super clean line between the wood and the paint. Use FrogTape!
- Pinterest Tip: Place it in a home office setting with a laptop and a simple plant.
10. Bookcase with Faux Paneling
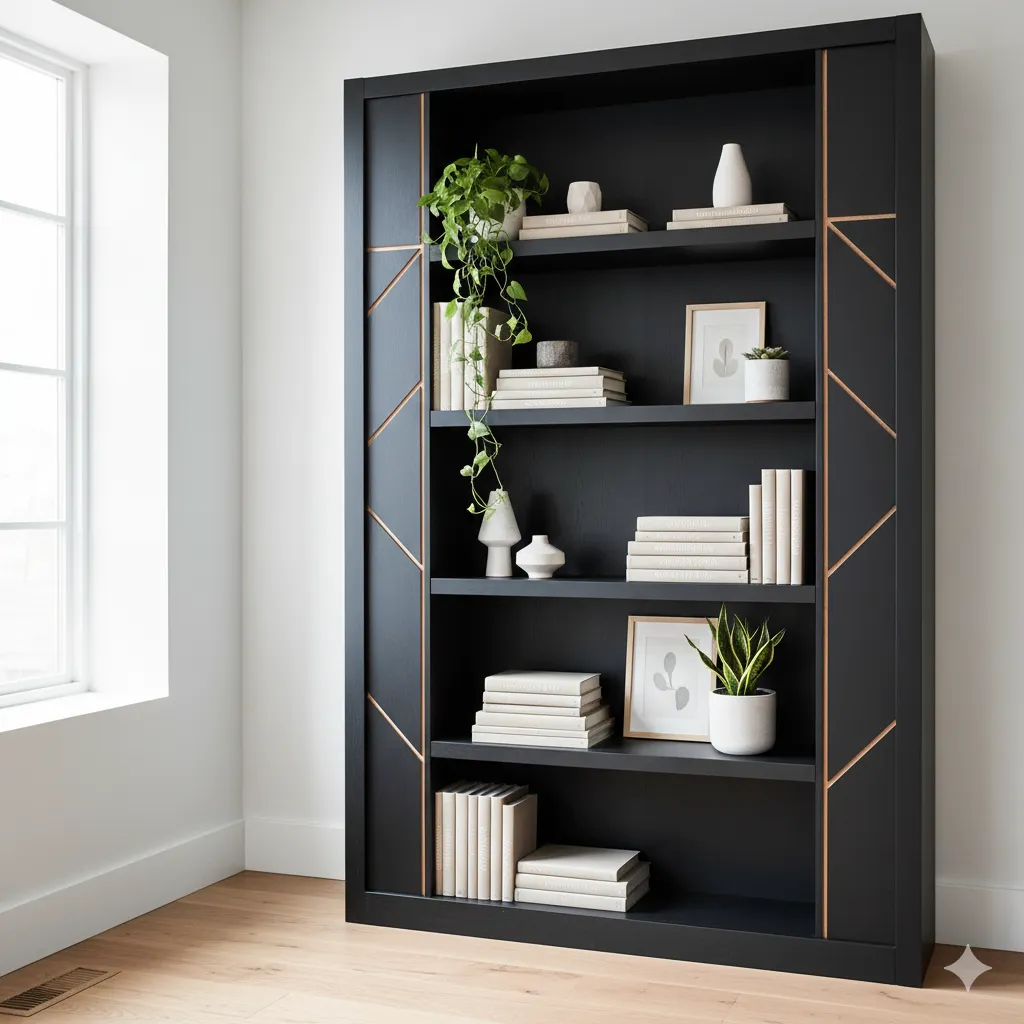
- Before: A simple, cheap-looking bookcase.
- After: Add thin wood strips (available at home improvement stores) to the sides and back to create a faux paneled look.
- Paint it all a single, dramatic color like black.
- Cost: $40-$50.
- Time: 4-6 hours.
- Challenges: Measuring and cutting the wood strips.
- Pinterest Tip: Fill the shelves with neatly arranged books, plants, and decorative objects.
11. Kitchen Cart Turned Plant Stand
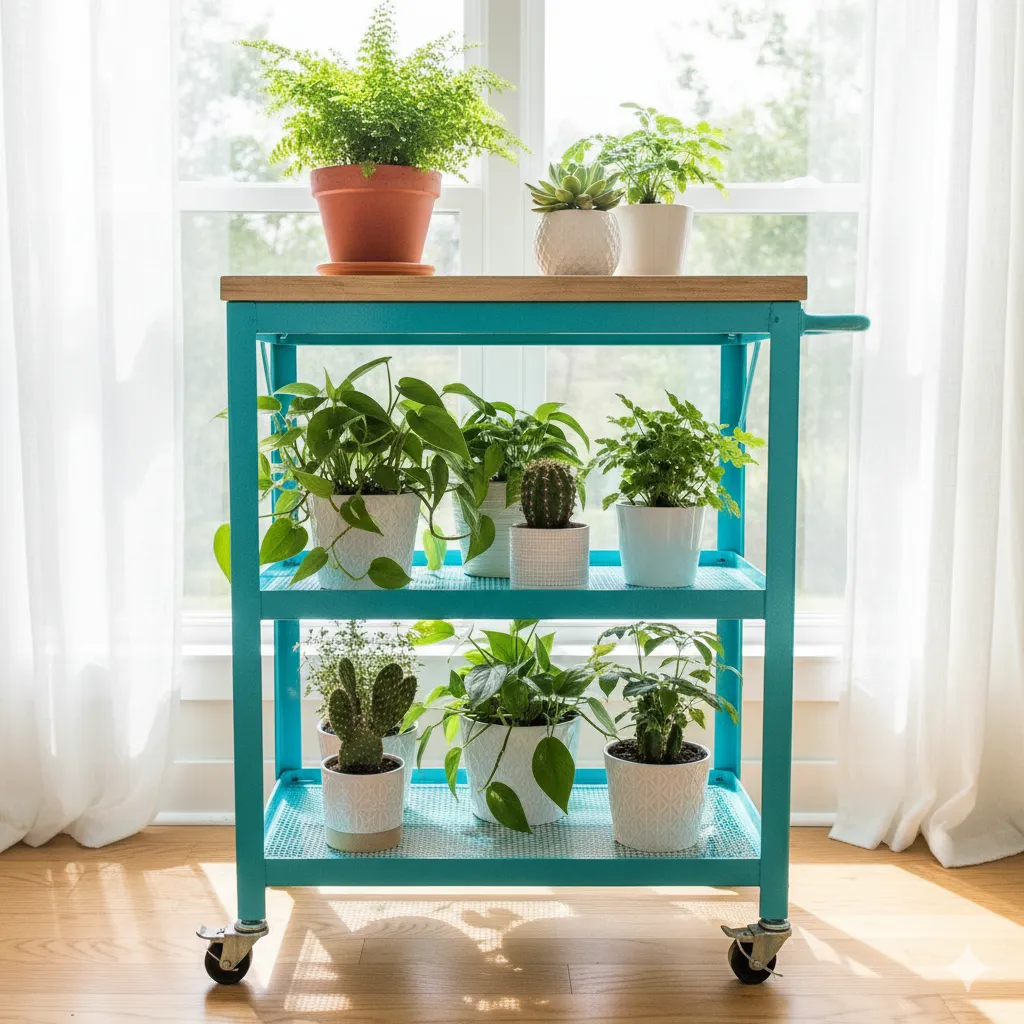
- Before: An old, rusty metal kitchen cart.
- After: The metal is cleaned and spray-painted in a bright color.
- A wooden shelf is added to the top, and it’s used to display plants.
- Cost: $20-$30 for paint and a piece of wood.
- Time: 3-4 hours.
- Challenges: Sanding down the rust.
- Pinterest Tip: A shot with lots of lush greenery on the shelves, styled near a window.
12. Ornate Mirror Makeover
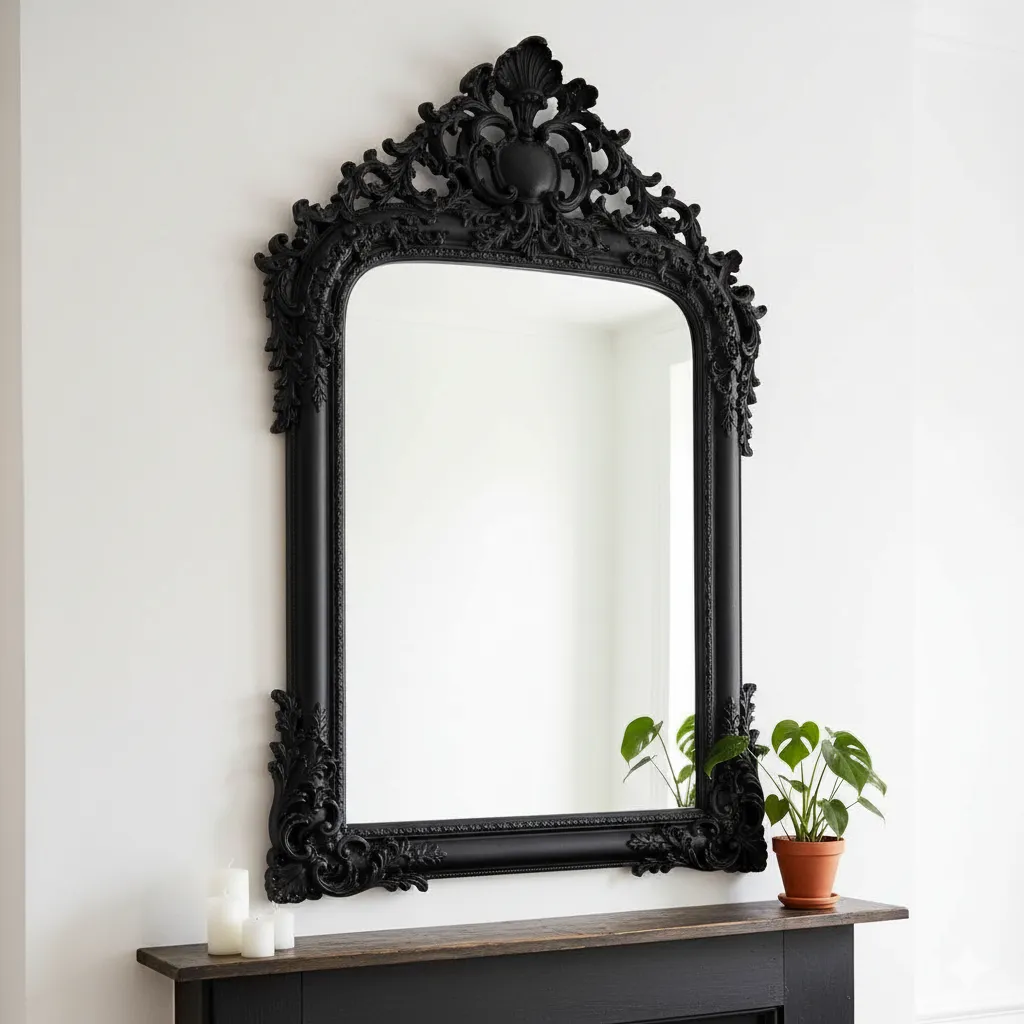
- Before: A big, clunky mirror with a dated, gold frame.
- After: The frame is spray-painted matte black or a bright color.
- The mirror is cleaned to perfection.
- Cost: $10-$15.
- Time: 1-2 hours.
- Challenges: Keeping the mirror clean while painting the frame. Use painter’s tape and plastic sheeting.
- Pinterest Tip: A shot of the mirror on a mantelpiece or an entryway table.
13. Old Cabinet into a Faux Fireplace

- Before: A long, low cabinet.
- After: The cabinet is painted, and a space is created in the middle to insert a small electric fireplace insert.
- Cost: $150-$200 for paint and the insert.
- Time: 8-10 hours.
- Challenges: Finding the right size insert and cutting the hole for it.
- Pinterest Tip: Stage it with a cozy rug in front and a few candles on top.
14. Painted Headboard
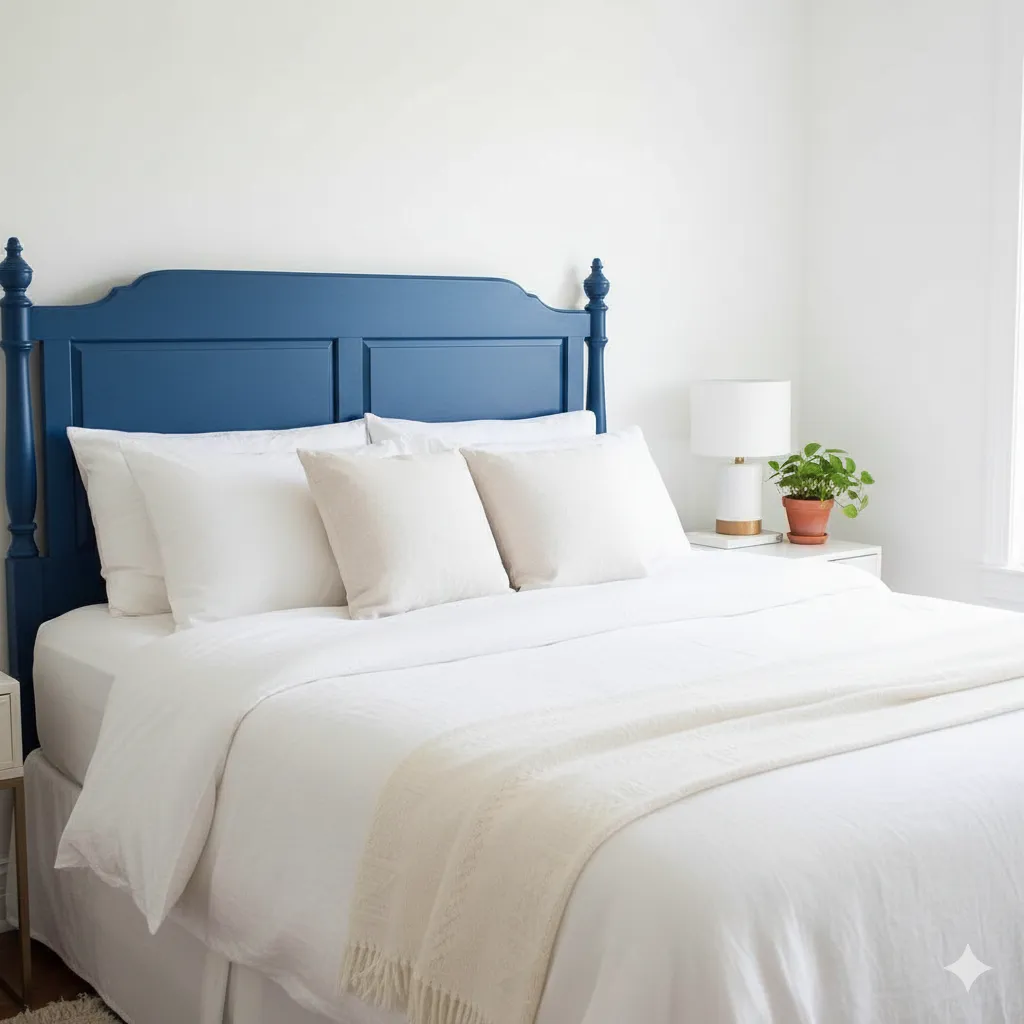
- Before: A simple wooden headboard that’s seen better days.
- After: The headboard is sanded and painted in a bold, jewel-toned color like deep emerald or sapphire blue.
- Cost: $20-$30 for paint.
- Time: 3-4 hours.
- Challenges: Getting into the details of carved wood. Use a small detail brush.
- Pinterest Tip: A shot of the finished headboard with crisp white bedding.
15. Rustic Barn Wood Table
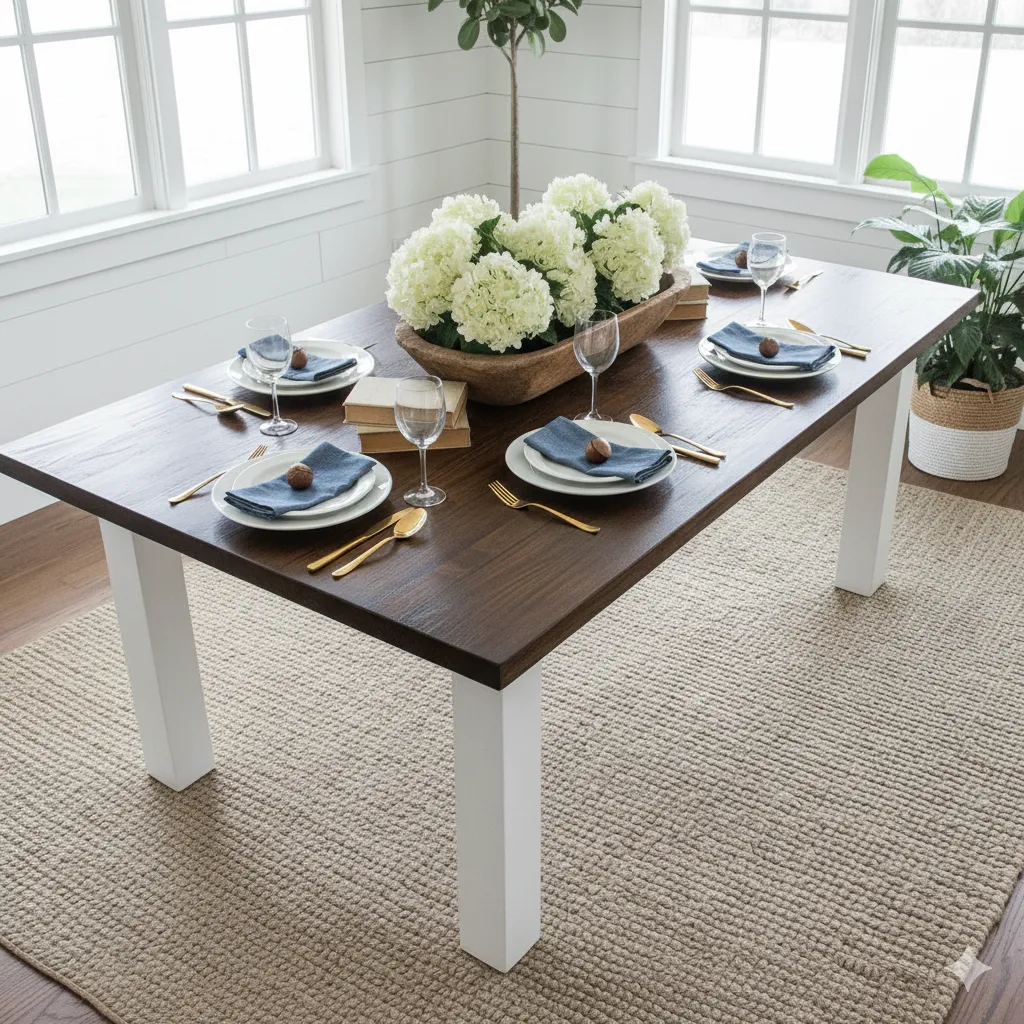
- Before: A plain, light-wood dining table.
- After: The top is stained with a deep, dark stain.
- The legs are painted white.
- The entire piece is then sealed with a clear matte sealant.
- Cost: $40-$50 for stain, paint, and sealant.
- Time: 5-6 hours.
- Challenges: Sanding the top perfectly smooth.
- Pinterest Tip: A shot from above with a beautiful table setting.
16. Stool to Side Table
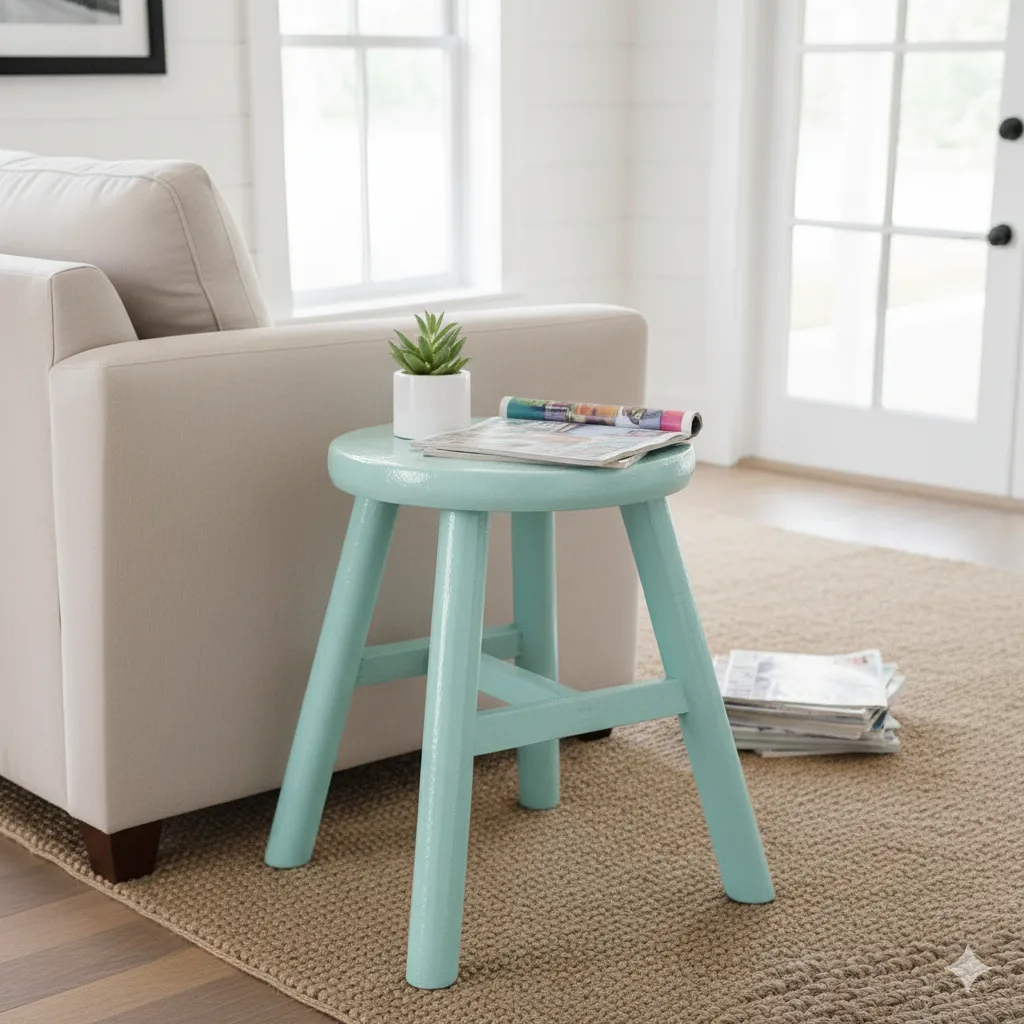
- Before: A beat-up wooden stool.
- After: It is sanded, painted a glossy color, and used as a small accent table next to a couch.
- Cost: $10 for paint.
- Time: 2 hours.
- Challenges: None! This is an easy furniture restoration tutorial for beginners.
- Pinterest Tip: A shot of the stool with a small plant or a magazine on top.
What to Look for at the Thrift Store
So, you’ve decided to take the plunge. You’re standing in front of the furniture section. Where do you even begin? I’ve been there, overwhelmed by the options. The key is to train your eye to see beyond the grime and the scuffs.
How to Spot a Good Base Piece
First things first, get up close and personal. I’m talking about the materials. Your number one goal is to find solid wood. It’s sturdy, reliable, and takes paint and stain like a champ. Give a piece a good knock. Does it sound hollow? That’s probably particle board, and while it’s not impossible to flip, it’s a real pain. It chips easily, doesn’t hold screws well, and can crumble if it gets wet. Don’t waste your time or money on that.
Next, check for structural soundness. Give the piece a good shake. Are the legs wobbly? Are the drawers falling out? Minor fixes are fine, but a completely rickety piece might not be worth the headache. The hardware is also key. Don’t worry if the knobs are ugly; you can replace them. Just make sure the existing holes aren’t stripped out.
Finally, think about style potential. A vintage mid-century modern dresser might be a little beaten up, but its clean lines are begging for a simple stain job. An old, curvy farmhouse table could be a stunning piece with some chalk paint and distressing. See the silhouette, not the scratches.
Cost vs. Effort Trade-Off
Look, I’ve made this mistake so you don’t have to. Sometimes you see a piece that’s a steal, but the restoration is going to cost you more in time and materials than it’s “worth.” Be honest with yourself about your skill level and how much you’re willing to invest. A piece that needs a new top, new legs, and every single screw replaced might be a great deal for someone else, but it could be a money pit for you.
Hack: Always check the back and underside of a piece of furniture. You’ll often find a manufacturer’s stamp or a date. Sometimes, that seemingly ugly, beat-up dresser is a genuine antique just waiting to be restored to its former glory. That’s a good sign of quality materials!
Tools, Supplies, and Prep
So you’ve found your gem. Now for the fun part: turning it into something beautiful. This is where a little preparation goes a long way. Having the right tools and supplies makes the process so much smoother.
Essential Tools & Finishes
Your toolkit doesn’t need to be massive, but a few key items are non-negotiable. A good orbital sander is a lifesaver; it’ll save your hands from hours of sanding. You’ll also need various brushes (a good quality one for paint, a cheaper one for primer), a drop cloth to protect your floor, and some safety gear like a mask and safety glasses.
When it comes to paint, there are so many options. Chalk paint is super popular for a reason: it often doesn’t require sanding or priming, making it a great choice for beginners. Milk paint gives a beautiful, rustic, chipped look, perfect for a farmhouse vibe. Spray paint is fantastic for a smooth, even finish, especially on hardware or smaller pieces. Finally, don’t forget stain for showing off that beautiful wood grain.
Prep Work: Don’t Skip It!
This is the most tedious part, but it’s crucial. Don’t skip it, or your finish will look sloppy and won’t last. First, clean the piece thoroughly with a degreaser. I’ve found that a simple mix of warm water and a little dish soap works wonders. Remove all the old hardware. Then, sand it down. You don’t need to go crazy, just scuff up the surface so the paint has something to grip onto. If you’re using chalk paint, you can often skip the heavy sanding, but I still recommend a light scuff. Finally, prime the piece, especially if you’re painting a dark piece a light color. Primer prevents bleed-through and ensures a consistent finish.
Time vs. Difficulty
Some projects are a weekend breeze; others are a marathon. A simple paint job on a small side table can take just a few hours. A complete overhaul of a large dresser with new hardware and extensive sanding? That’s a different story. Be realistic about the time and effort you’re willing to put in. Start with something simple to build your confidence before tackling that complex, multi-day project.
Hack: Save old toothbrush handles and cut them at an angle. They make the perfect tool for getting into small, detailed crevices on ornate furniture to clean them before you start painting. It’s better than a wire brush, IMO, because it won’t scratch the wood.
Finishing Touches & Styling
You’ve done the hard part. The piece is flipped, and it looks amazing. Now you need to make sure it lasts and that you capture its beauty for all to see.
Hardware Upgrades
Never underestimate the power of hardware upgrades. A new set of knobs or pulls can completely change the look of a piece. Think of it as jewelry for your furniture. You can find unique and inexpensive options at places like Home Depot, Anthropologie, or even on Etsy. It’s a small detail that makes a huge difference.
Sealants & Protection
Your hard work deserves protection. After the paint or stain is completely dry, you need to seal it. For chalk paint, I love a good wax sealant. For other paints and stains, a clear polyurethane or varnish will work wonders. They come in different sheens—matte, satin, or glossy—so you can pick one that complements your style.
Photographing for Pinterest
This is where you make your project shine. You need good backgrounds and natural light. Take your pictures outside if possible, or near a large window. Shoot both a before and after composition to really show the transformation. For staging, use props that complement the piece and its new style. A vase of flowers, a stack of books, or a simple throw can make the piece look like it belongs in a magazine.
Hack: Use a free app like Snapseed or Lightroom Mobile to adjust your photo’s brightness, contrast, and color balance. You don’t need expensive software to make your photos pop!
Closing Thoughts
So there you have it. The secret isn’t some expensive, complicated technique. The real magic is in seeing the potential in a thrift store find, giving it a little elbow grease, and transforming it into something beautiful and unique. A good thrift store furniture makeover is a celebration of creativity, affordability, and sustainability.
I promise you, once you do one upcycled furniture project, you’ll be hooked. It’s a satisfying feeling to look at a piece and know that you brought it back to life. So, what are you waiting for? Pick a project from this list, find a piece, and get to it. Snap some great pictures with keyword-rich descriptions, and who knows, maybe your DIY furniture flip will be the next viral sensation. Tag me in your pictures on social media and show me what you created! I’m genuinely curious to see what you come up with.
