You know that feeling when you walk into a home and it just screams “you”? That’s the magic of personal style, and IMO, there’s no better way to show off your personality than through one-of-a-kind art. But let’s be real, buying custom pieces can cost an arm and a leg, and most of us aren’t exactly swimming in cash. That’s where I come in! I’ve spent years hunting down forgotten treasures and turning them into jaw-dropping decor, and I’m here to let you in on my little secret: the best art isn’t found in a gallery, it’s found in a thrift store.
Thrift stores, flea markets, garage sales—these aren’t just places to find a sweater for a theme party. They’re a goldmine of raw materials just waiting for a creative touch. It’s not just about saving money; it’s about a more sustainable way to decorate. You get to breathe new life into something that might have been thrown away, giving it a second chance to shine. Plus, the thrill of the hunt? Unbeatable.
So, are you ready to skip the expensive home decor stores and get your hands dirty? I’m going to walk you through 17 of my favorite ideas for creating stunning, budget-friendly DIY wall art. Whether you’re a seasoned DIYer or just starting out, I promise you’ll find a project that’s not only easy but also totally Pinterest-worthy. Let’s get to it!
1. DIY Wall Art from Old Frames
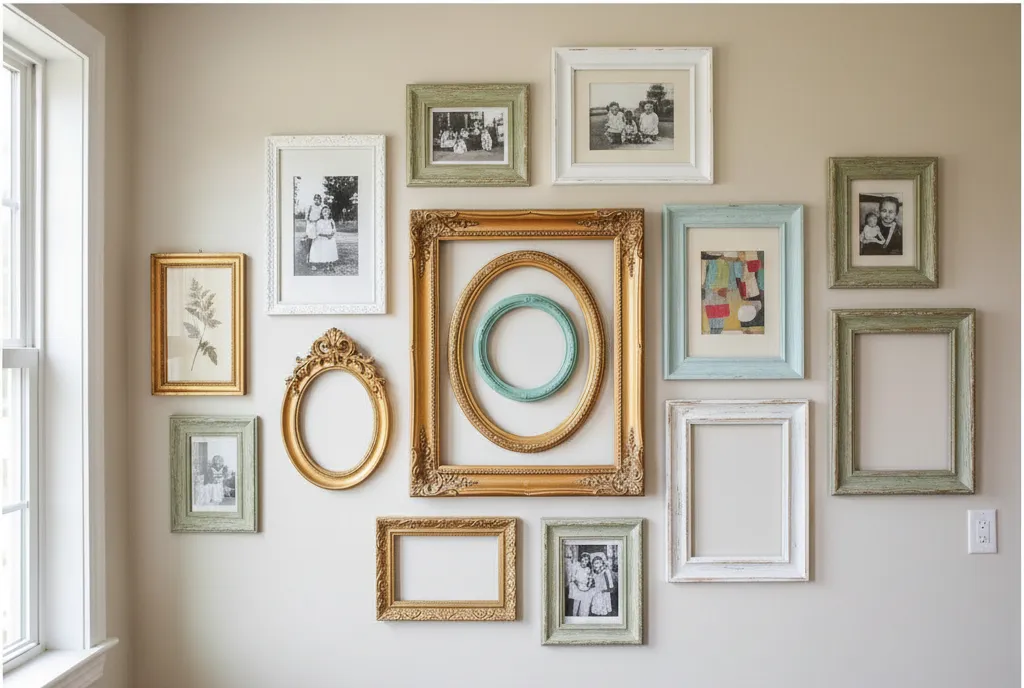
Have you ever seen a pile of dusty, mismatched frames at a thrift store and thought, “What a waste”? Think again. A good frame is a good frame, no matter how tired it looks. You can turn a collection of these forgotten gems into an epic gallery wall that looks curated, not chaotic.
The key is variety. Find frames in different sizes, shapes, and materials. Don’t worry if they’re different colors—that’s the beauty of it! A fresh coat of paint can instantly transform them. You can pick a single color for a cohesive look or go wild with a mix of colors for a playful, eclectic vibe. Distressing the frames with a little sandpaper can give them a perfectly shabby-chic, vintage feel. Once you’ve got your frames ready, the fun really begins. Fill them with your favorite photos, postcards, or even some of the other DIY art ideas we’ll talk about later.
Styling Tip: If you find a stunning frame but the glass is broken, don’t pass it up! The frame itself is the star. Just remove the glass and use the frame as a standalone decorative piece. You can hang it on its own or even create a layered look by placing a smaller, different-colored frame inside it.
2. Repurposed Fabric Wall Hangings
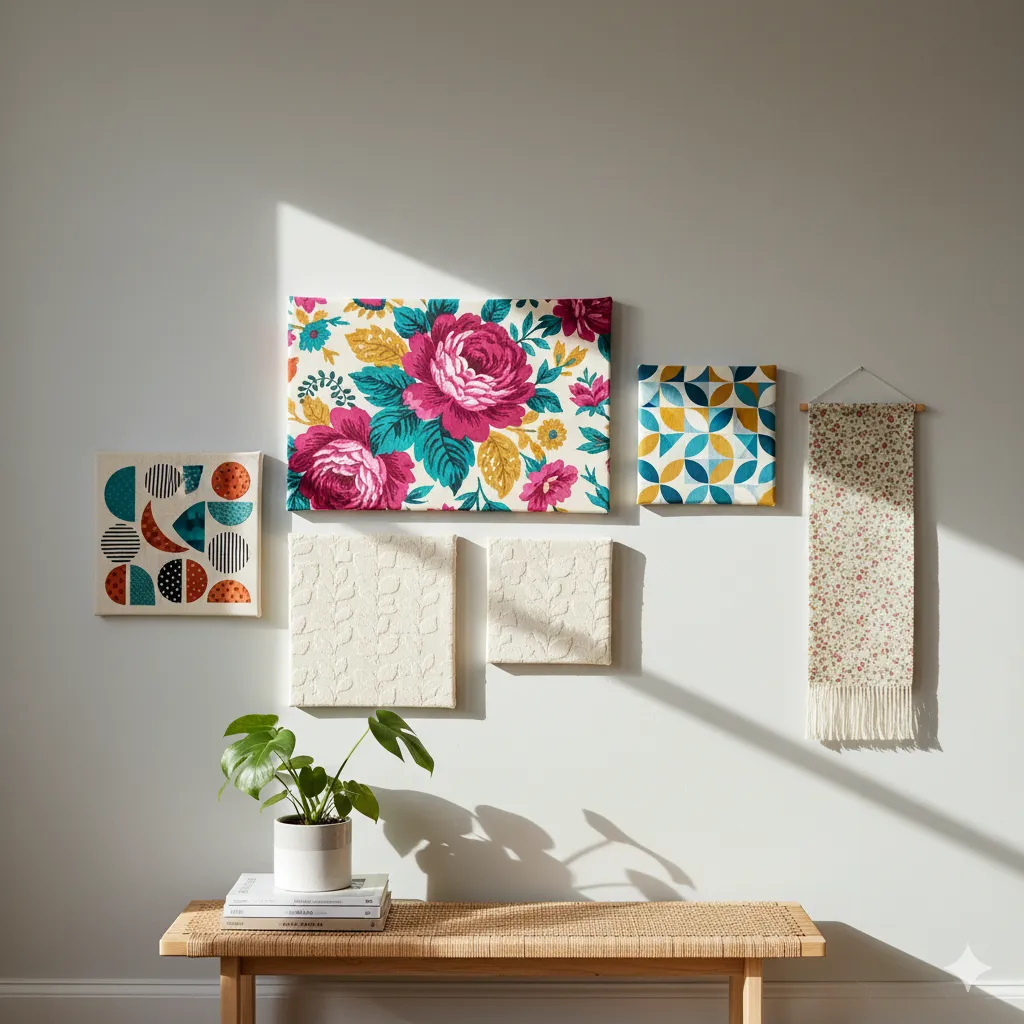
This is probably one of the easiest and most impactful DIY wall art projects you can do. Find a large canvas board at a thrift store (often you can find old paintings on canvas for super cheap—just paint over them!) and a piece of thrifted fabric.
Stretch the fabric over the canvas and staple or glue it to the back. It’s a quick way to create a huge piece of art that perfectly coordinates with your room’s color scheme. I love doing a series of these with different but complementary fabrics for a sleek, modern look.
Styling Tip: Use a hot glue gun to create a textured, raised design on a blank canvas. Then, cover it with a solid-colored fabric. The subtle texture underneath will give it a high-end, bespoke feel.
3. Vinyl Records as Wall Decor
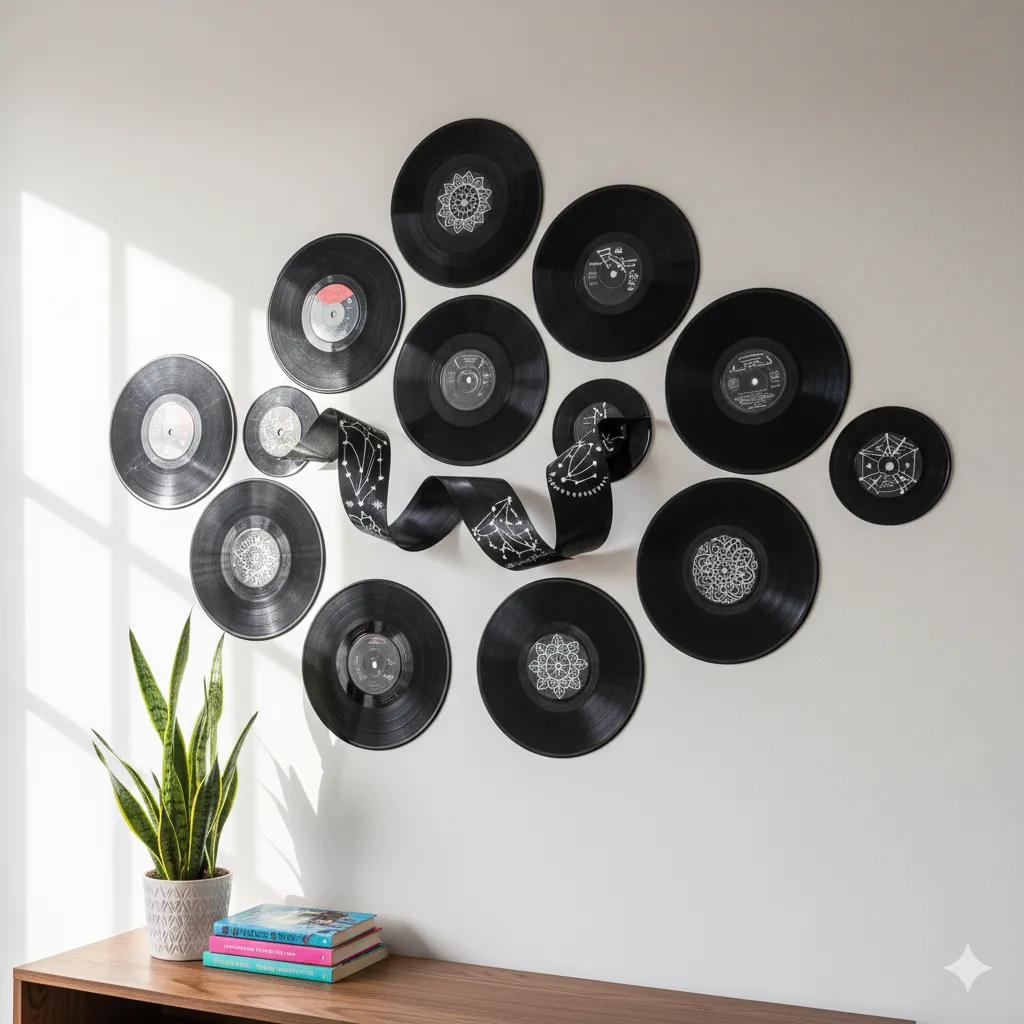
Calling all music lovers! Those scratched-up vinyl records nobody listens to anymore? They’re practically begging to be turned into art. The slick black surface and perfect circle are a minimalist decorator’s dream.
You can hang them as they are for a retro, music-themed wall. It’s a classic look that never goes out of style. But if you want to get really creative, paint them! Use stencils to create patterns or freehand your own designs. A word of caution: vinyl can be a bit slick, so I recommend using an acrylic primer first. Trust me, it makes a huge difference.
Styling Tip: Use a heat gun (carefully!) to gently melt and warp the vinyl records into cool, sculptural shapes. You can then hang them on the wall for a truly unique 3D effect.
4. Thrifted Mirrors Turned into Statement Pieces
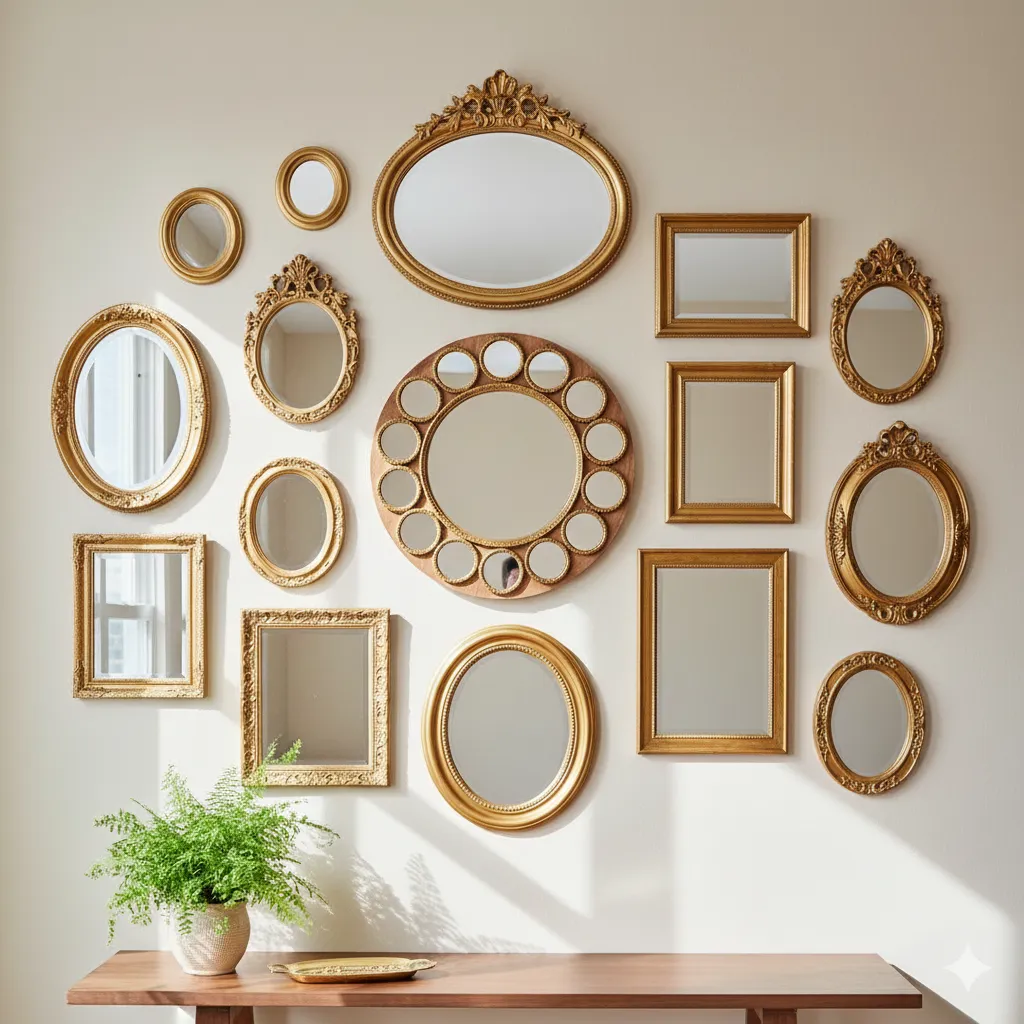
Mirrors are more than just for checking your outfit; they can be art, too. If you can find a collection of small, inexpensive mirrors at a thrift store, you have the makings of an amazing gallery wall. The way they reflect light can make a room feel bigger and brighter.
If you’re struggling to find mirrors with a similar style, don’t worry! Painting the frames in a single color can unify them and create a polished, cohesive look. Think of a collection of gold-painted mirrors in various shapes. It’s a look that just screams “glam.”
Styling Tip: Glue a group of small, inexpensive circular mirrors to a larger piece of wood or a canvas to create a stunning, sunburst-style mirror that looks way more expensive than it is.
5. Wooden Crates & Pallet Wall Art
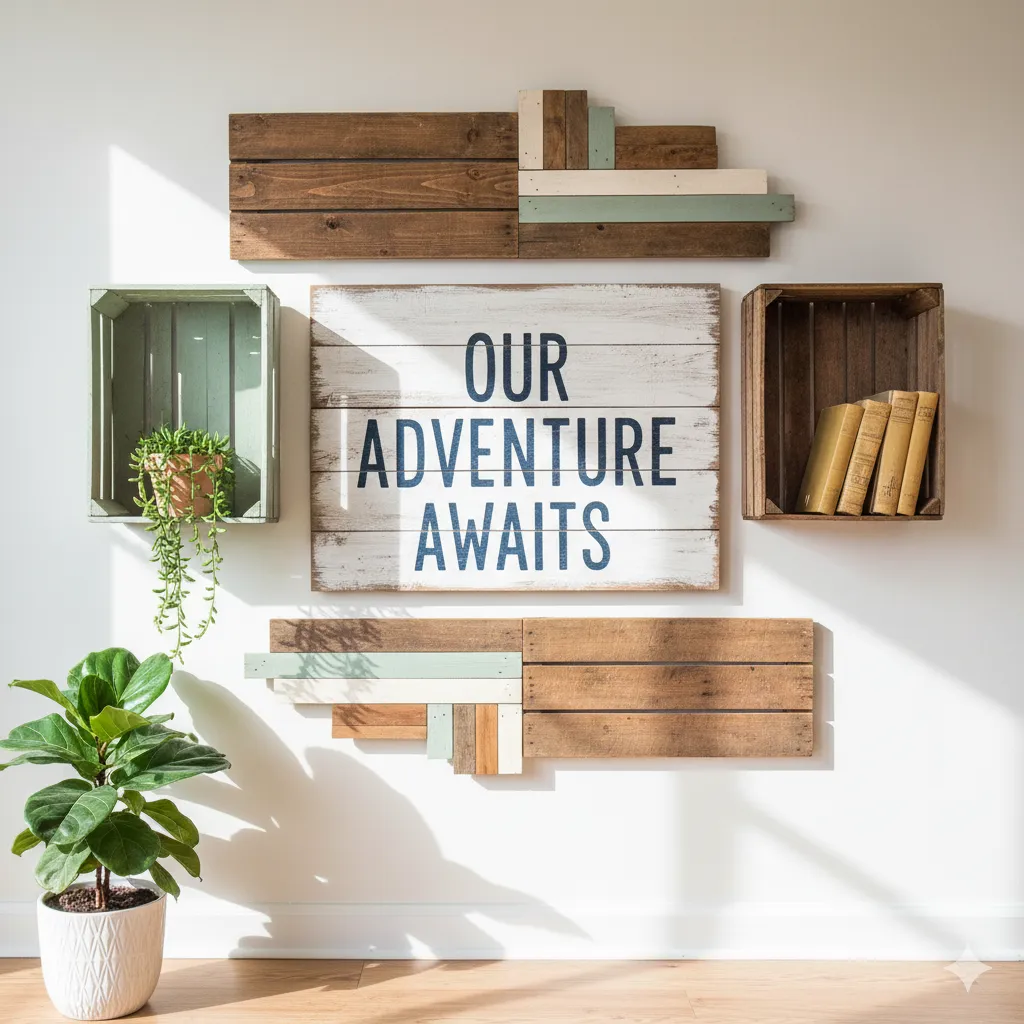
I’ve been a huge fan of the rustic farmhouse vibe for a while now, and nothing says “rustic” like salvaged wood. Old wooden crates and pallets are often available for free or for a few bucks at garage sales or even behind stores.
You can use the slats from a disassembled pallet to create a rustic sign. A quick sand and a coat of stain or paint, and you’ve got a perfect canvas for a painted quote or a stenciled design. Crates can be hung on the wall as mini shelves for plants or small decorative items.
Styling Tip: Arrange a few painted wooden crate sides into a geometric pattern on your wall for an abstract art piece that adds tons of texture and dimension.
6. Book Pages & Sheet Music Collage
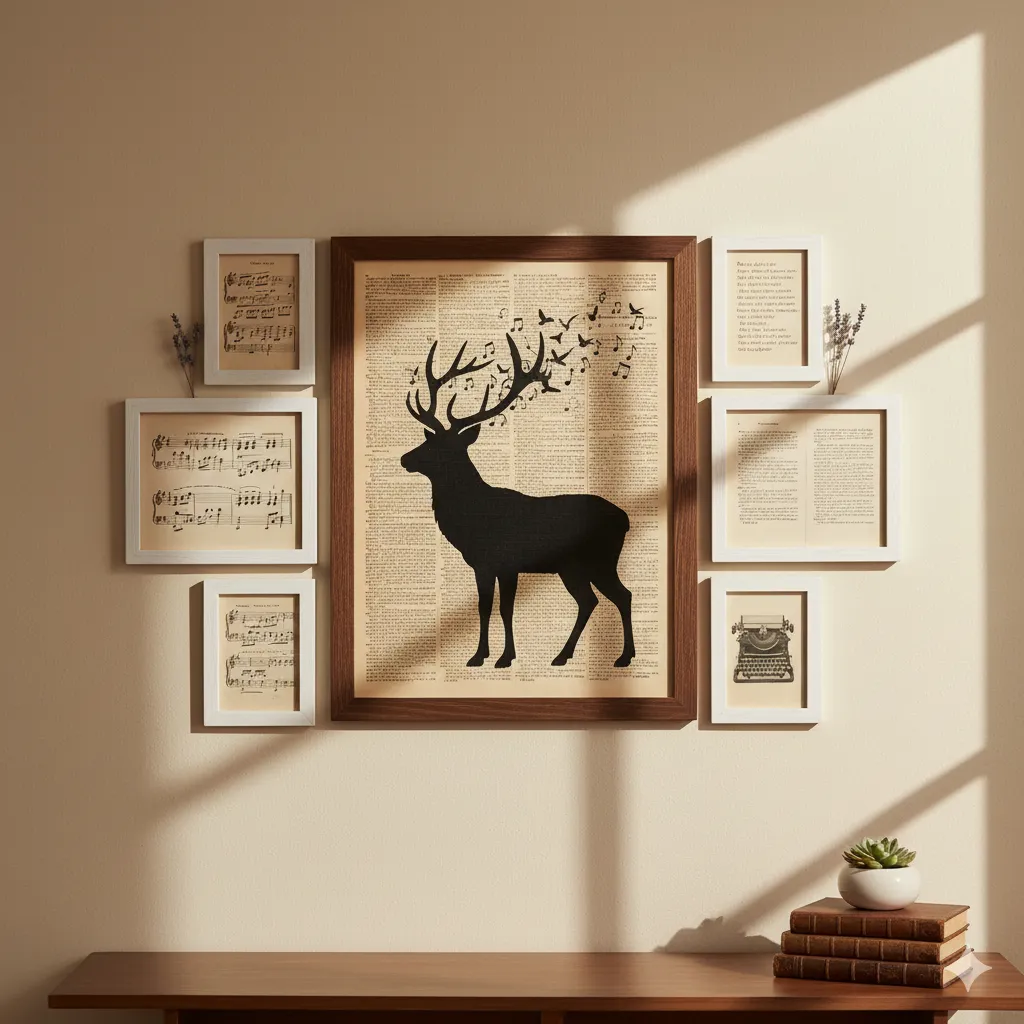
If you’re a bookworm, you might cringe at this one, but hear me out! Old, damaged books that are beyond repair are perfect for this project. The aged, yellowing pages have so much character. The same goes for old hymnals or sheet music.
You can use the pages to create a collage or decoupage them onto a canvas. Frame a single page from a beloved book for a minimalist look, or create a larger, layered collage. Old sheet music looks incredible when framed, especially if you have a musical connection to the piece.
Styling Tip: Instead of framing individual pages, create a decoupage effect by gluing pages from a dictionary or an old book onto a large wooden board. Then, paint a silhouette on top of the pages for a dramatic, layered look.
7. DIY Wall Clocks from Thrifted Finds
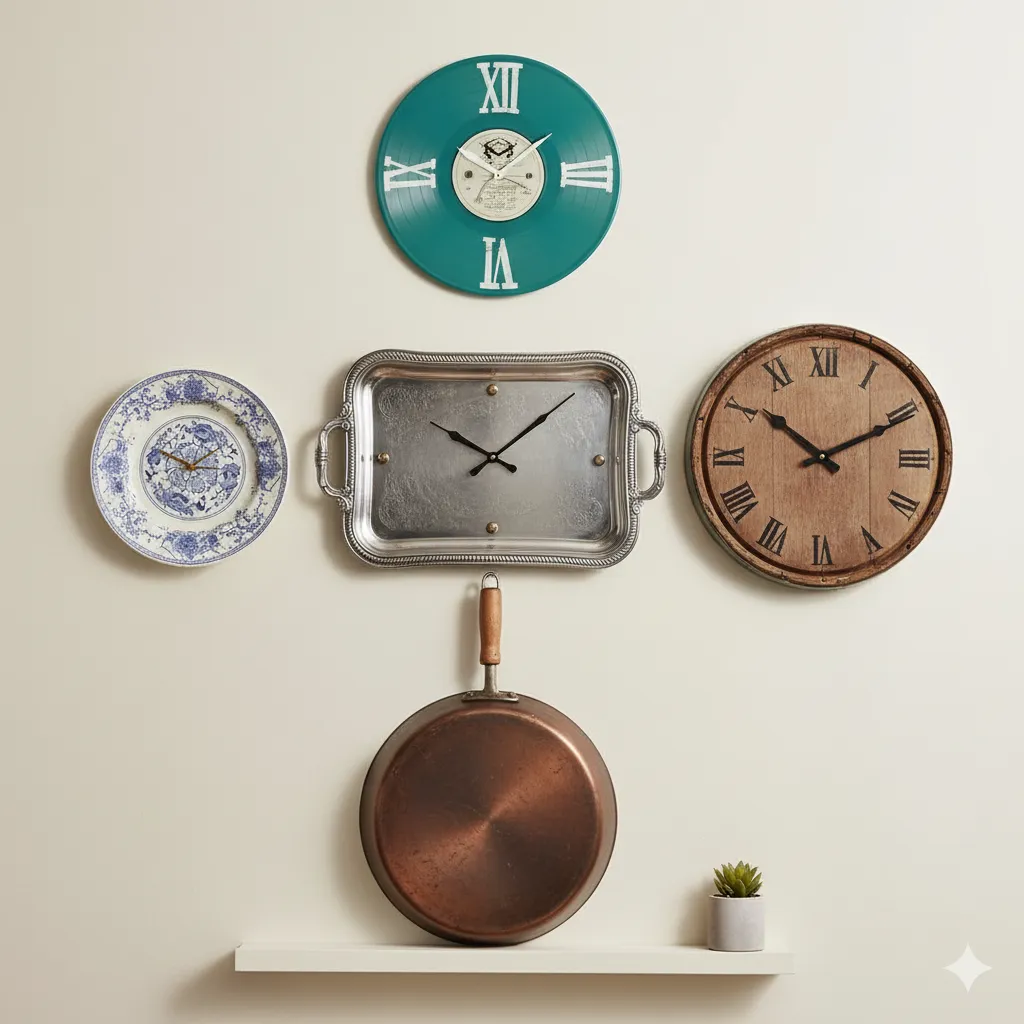
Why settle for a plain-looking clock when you can have one that’s both functional and a work of art? You can find tons of interesting objects at a thrift store that could be repurposed into a clock. Old serving trays, decorative plates, or even a large, flat frying pan can work!
You just need to get a cheap clock mechanism from a craft store, drill a hole in the center of your item, and install the mechanism. It’s an easy project that makes a big impact.
Styling Tip: Use a thrifted vinyl record as the base for a clock. You can paint it, add rhinestones, or just leave it as is. It’s a simple, retro-cool way to make a functional piece of art.
8. Thrift Store Plates as Wall Art
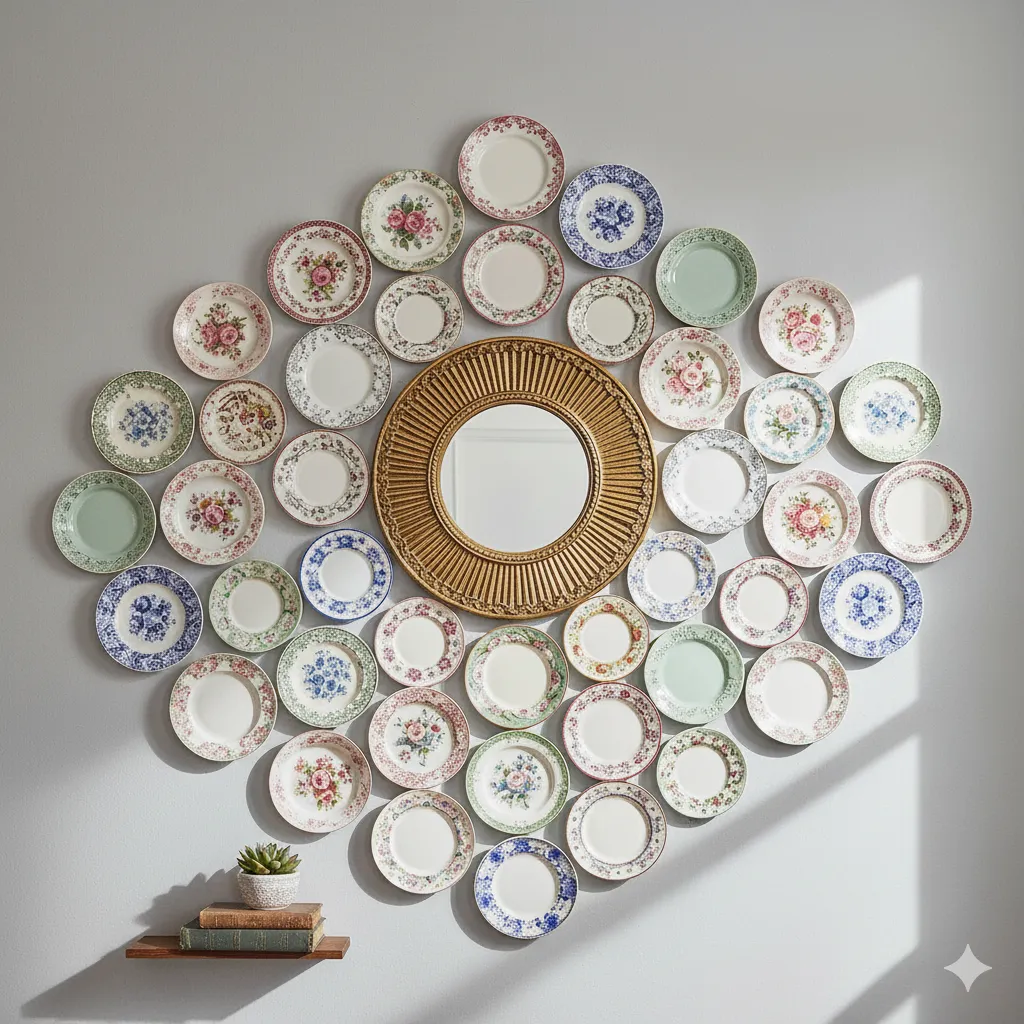
My mom has been doing this forever, so I guess I get it from her! A collection of vintage, mismatched plates on a wall looks surprisingly modern and cool. It’s an easy way to add a pop of color and an unexpected shape to your space.
Look for plates with interesting patterns, colors, or textures. You can group them together in a tight cluster or create a sprawling arrangement that fills a whole wall. The key is to play with the layout on the floor first to find a design that works before you start hanging them up.
Styling Tip: Use plate hangers to arrange a collection of small, patterned dessert plates around a large, central mirror for a truly unique statement piece.
9. Upcycled Window Frames
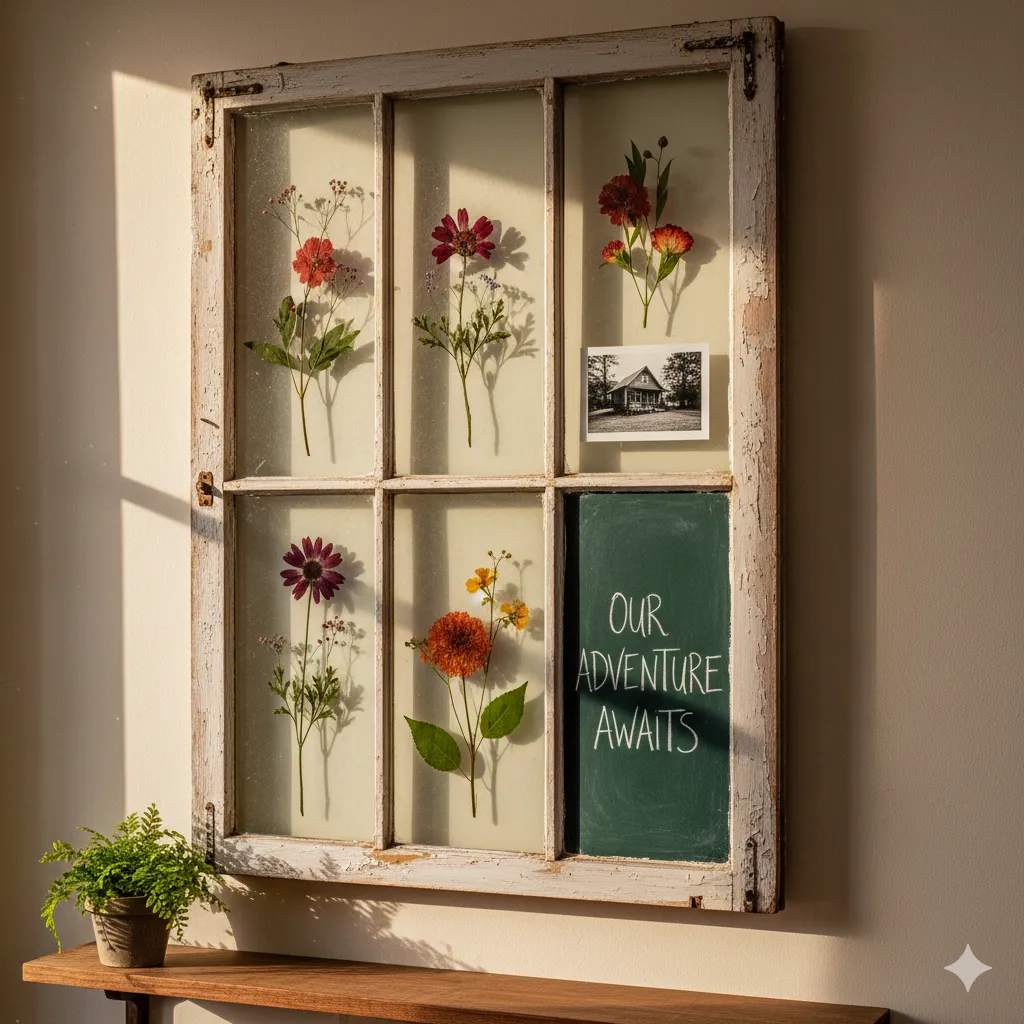
Old window frames have so much character, especially if they have some peeling paint and a little rust. They add a touch of rustic charm to any room. You can find them at flea markets or salvage yards for a steal.
You can use them as a standalone piece of art, or you can add photos to the individual panes for a multi-picture frame. You can also add some pressed flowers or plants for a nature-inspired look.
Styling Tip: Hang an old window frame on the wall and use chalk paint on the glass panes to create a functional and decorative message board.
10. Jewelry & Accessories as Art
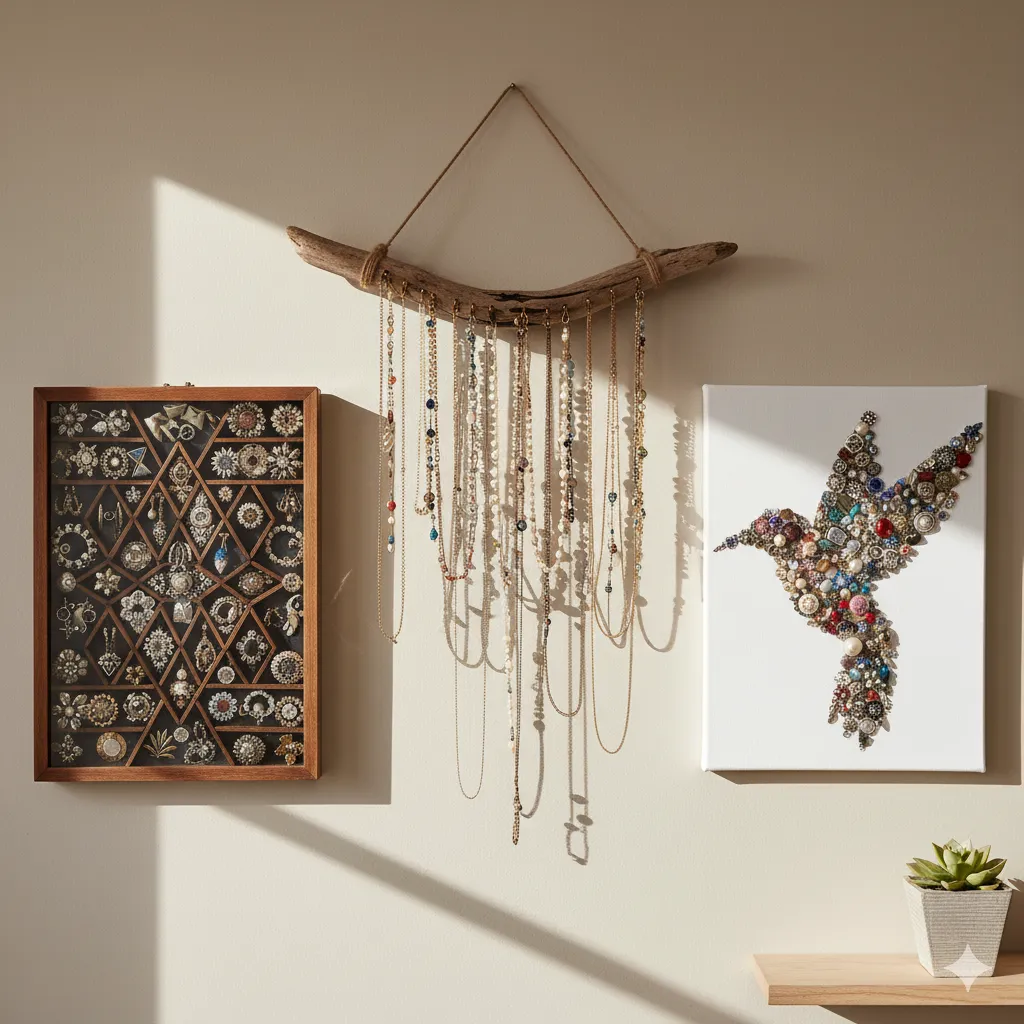
Is your grandmother’s old costume jewelry box just sitting in your closet? It’s time to put those sparkly pieces to good use! Old necklaces, brooches, and earrings can be turned into incredible art.
Frame a collection of old brooches in a shadow box for a stunning, three-dimensional piece of art. Or, for a more boho look, you can hang necklaces and chains from a piece of driftwood for a beautiful, draping display.
Styling Tip: Glue a collection of vintage brooches and earrings onto a blank canvas in the shape of a letter or a silhouette for a sparkling, personalized piece of art.
11. Rustic Signs from Salvaged Wood
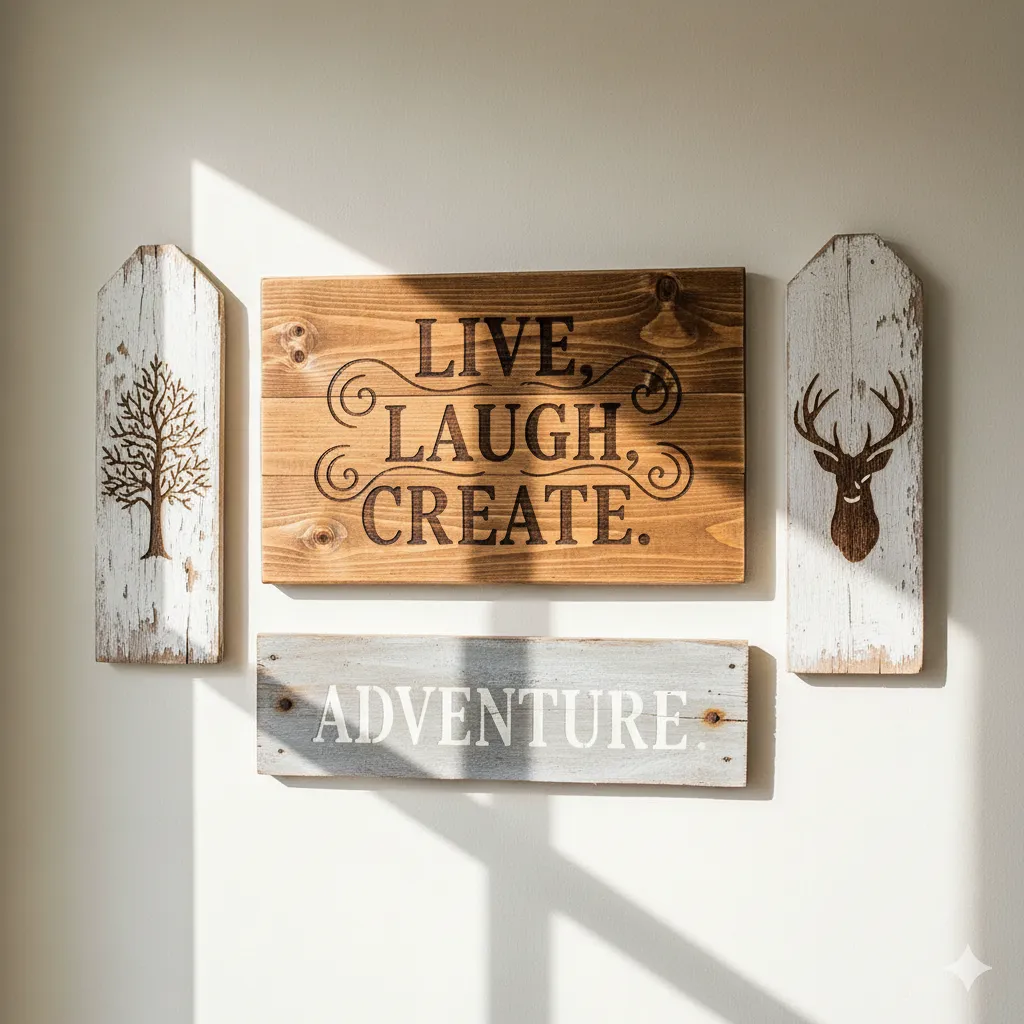
Remember that rustic farmhouse vibe we talked about? This project is all about it. Find a weathered piece of wood—it could be a piece of an old shelf, a wooden board, or even a slat from a fence.
Sand it down just enough to get rid of splinters, but leave some of that aged character. Use stencils or freehand to paint a quote or a design on it. This is a great way to personalize your space with a meaningful message.
Styling Tip: Instead of painting directly on the wood, use a wood-burning tool to etch your design. It creates a beautiful, permanent design that looks even more authentic and rustic.
12. Vintage Map & Travel-Themed Wall Art
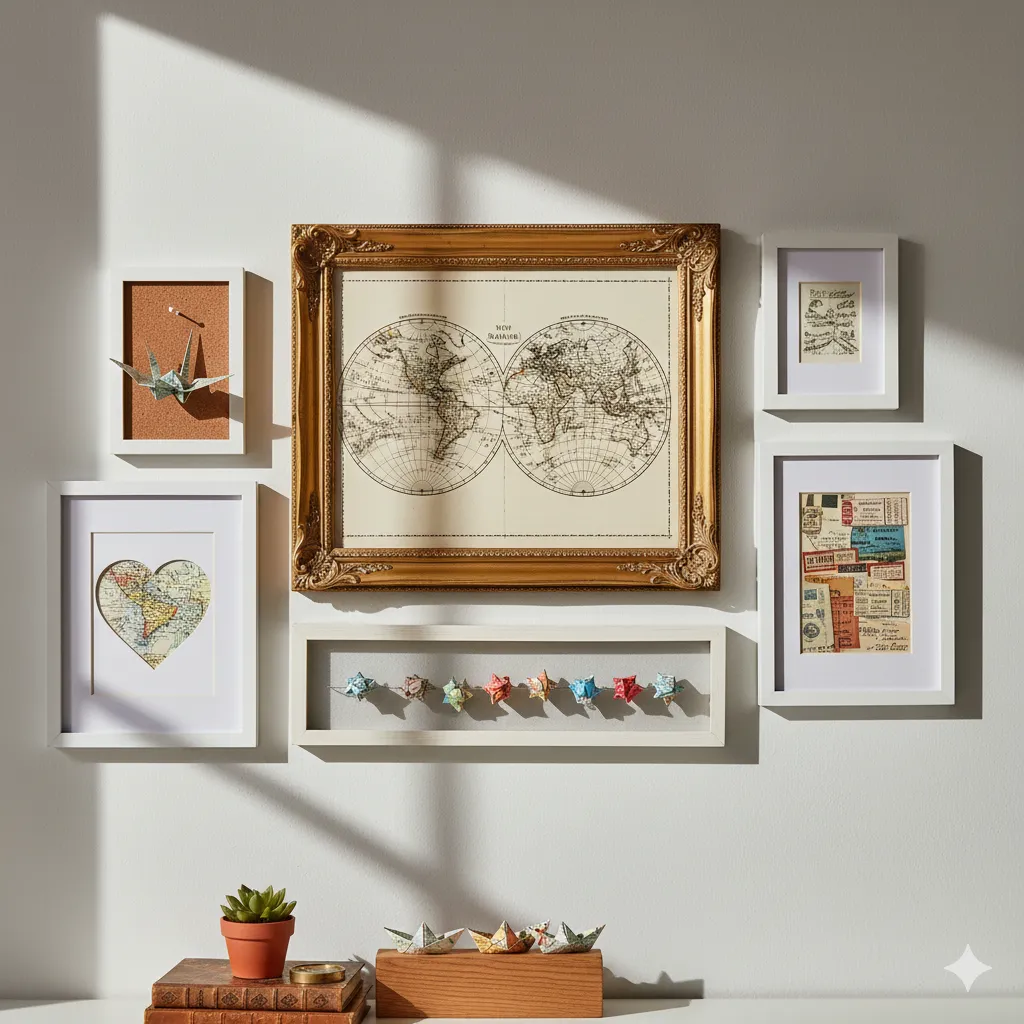
Are you a total wanderlust? Me too. Old atlases, maps, and travel guides are a goldmine for upcycled wall art. You can find them in the book section of most thrift stores.
Frame a single map of a place that holds special meaning to you, or create a collage of different maps and postcards. You can also cut out shapes from the maps—like a heart or the outline of your home state—and frame them.
Styling Tip: Use old map pages to create origami shapes like cranes or stars. Pin them to a corkboard or frame them for a unique, dimensional piece of art.
13. Upcycled Metal Trays & Tins
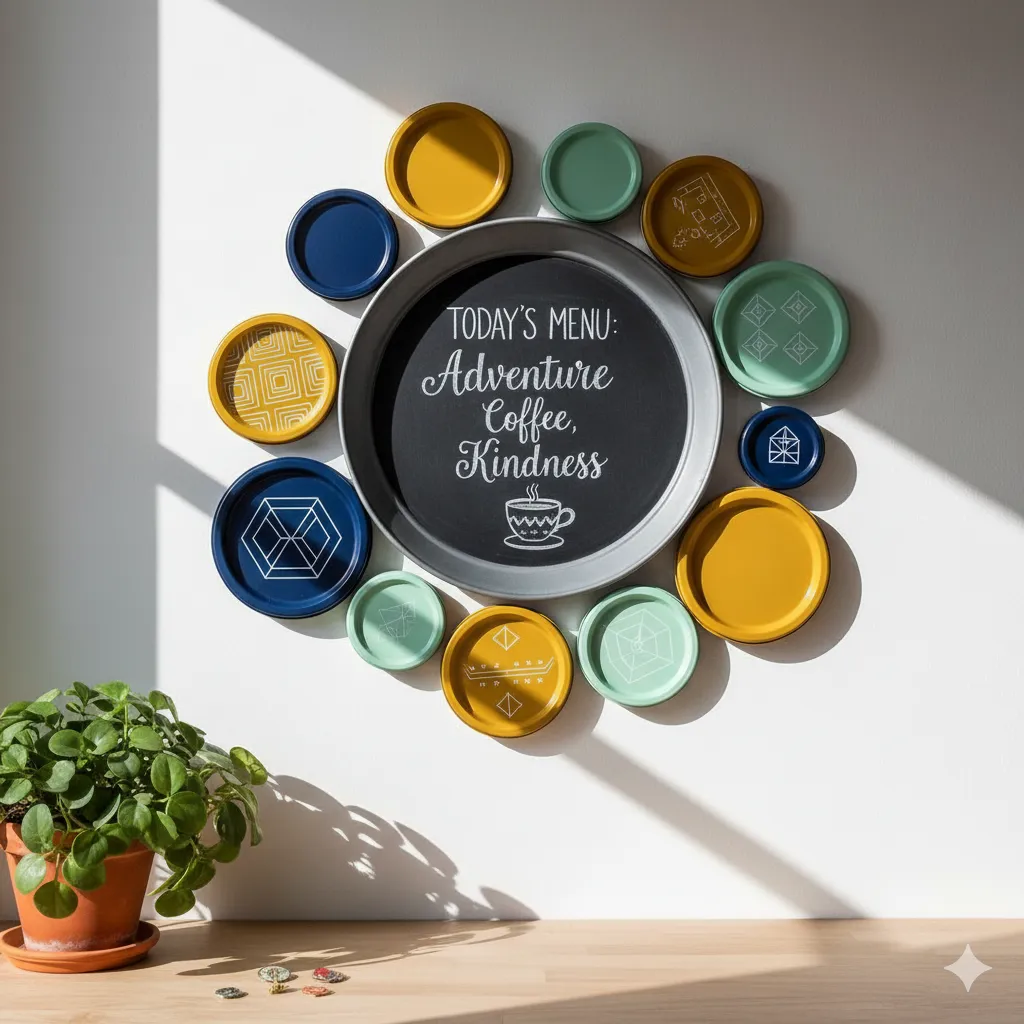
From old serving trays to decorative tin lids, there are so many fun, metallic finds just waiting to be turned into art. The shape and material add a totally different texture to your walls.
You can paint an old metal tray with chalkboard paint to create a fun and functional message board for your kitchen. Or, you can find a collection of pretty tins or lids and paint them in a cohesive color palette before arranging them on the wall.
Styling Tip: Find a large, circular metal tray and spray paint it to match your decor. Attach a small hook to the back, and you have a stylish, minimalist piece of art that’s super easy to change out.
14. Pressed Botanicals in Thrifted Frames
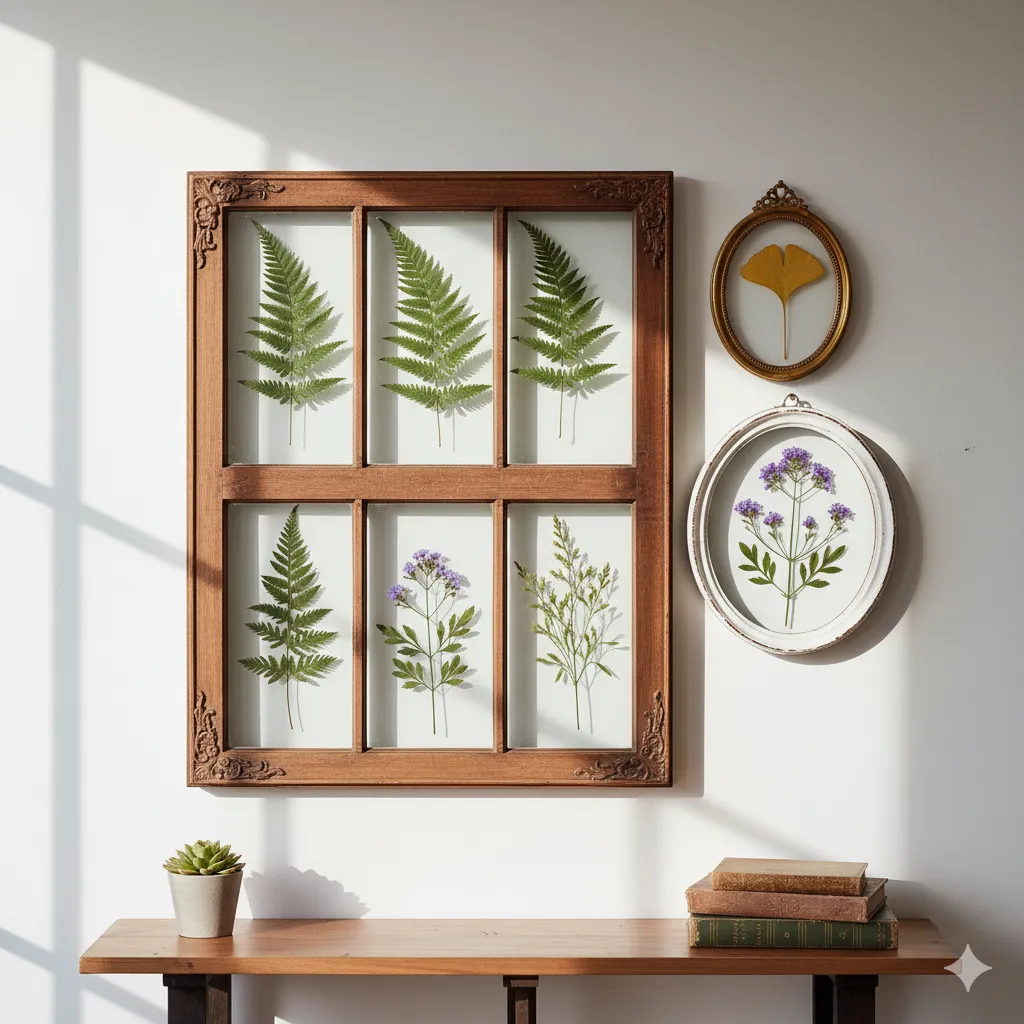
This project is a perfect way to bring a little bit of nature indoors. Find some dried flowers or leaves from your own yard or a local park. Then, find some old frames with glass—the more ornate, the better.
Press your flowers between the pages of a heavy book for a few weeks until they are completely flat and dry. Then, simply place them between two pieces of glass from a frame and seal them. The result is a stunning, minimalist piece that’s unique and totally beautiful.
Styling Tip: If you can’t find a frame with two pieces of glass, use a single piece of glass from a frame and glue the pressed flowers to it. Hang it on a wall where the light can shine through.
15. DIY Corkboard & Memo Boards
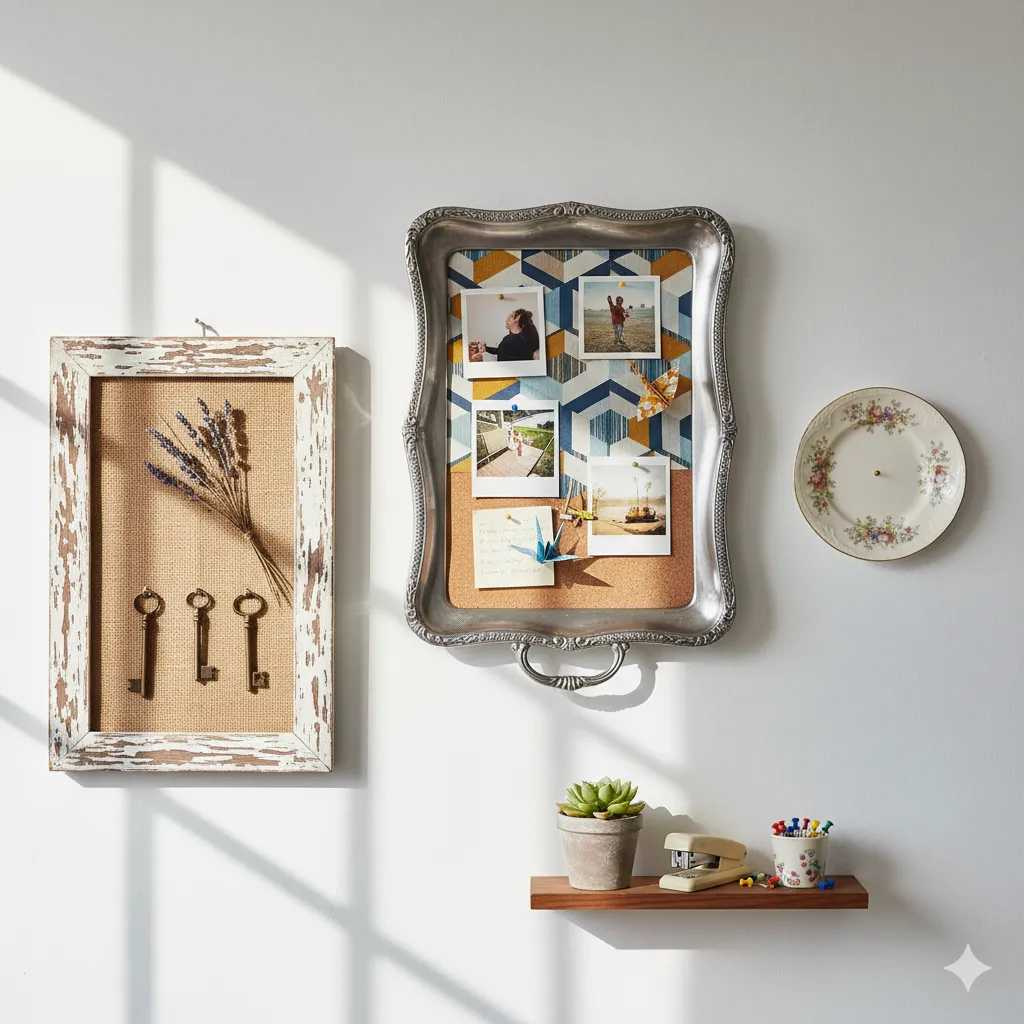
Functional art? Yes, please! You can easily turn a thrift store find into a decorative memo board. Grab an old, ornate frame or a vintage picture and some corkboard sheets from the craft store.
Cut the corkboard to fit the frame and cover it with a piece of thrifted fabric for a pop of color. Then, use the board to display photos, notes, or even small pieces of art. It’s a great way to keep your life organized and your walls beautiful.
Styling Tip: Use a large, thrifted serving tray with a raised edge as the base. Cut a piece of corkboard to fit inside and cover it with fabric. You’ll have a stylish, framed memo board that’s easy to move around.
16. Eclectic Collage Walls from Mixed Finds
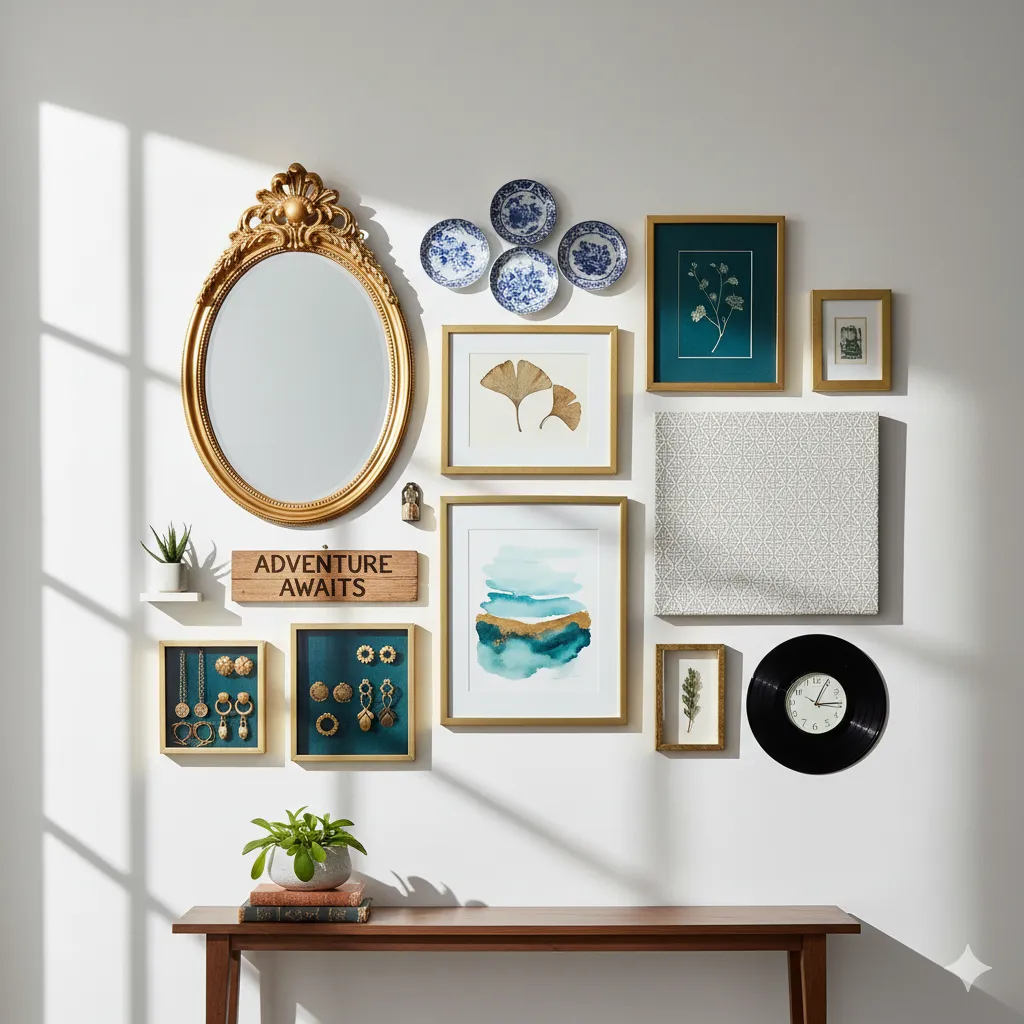
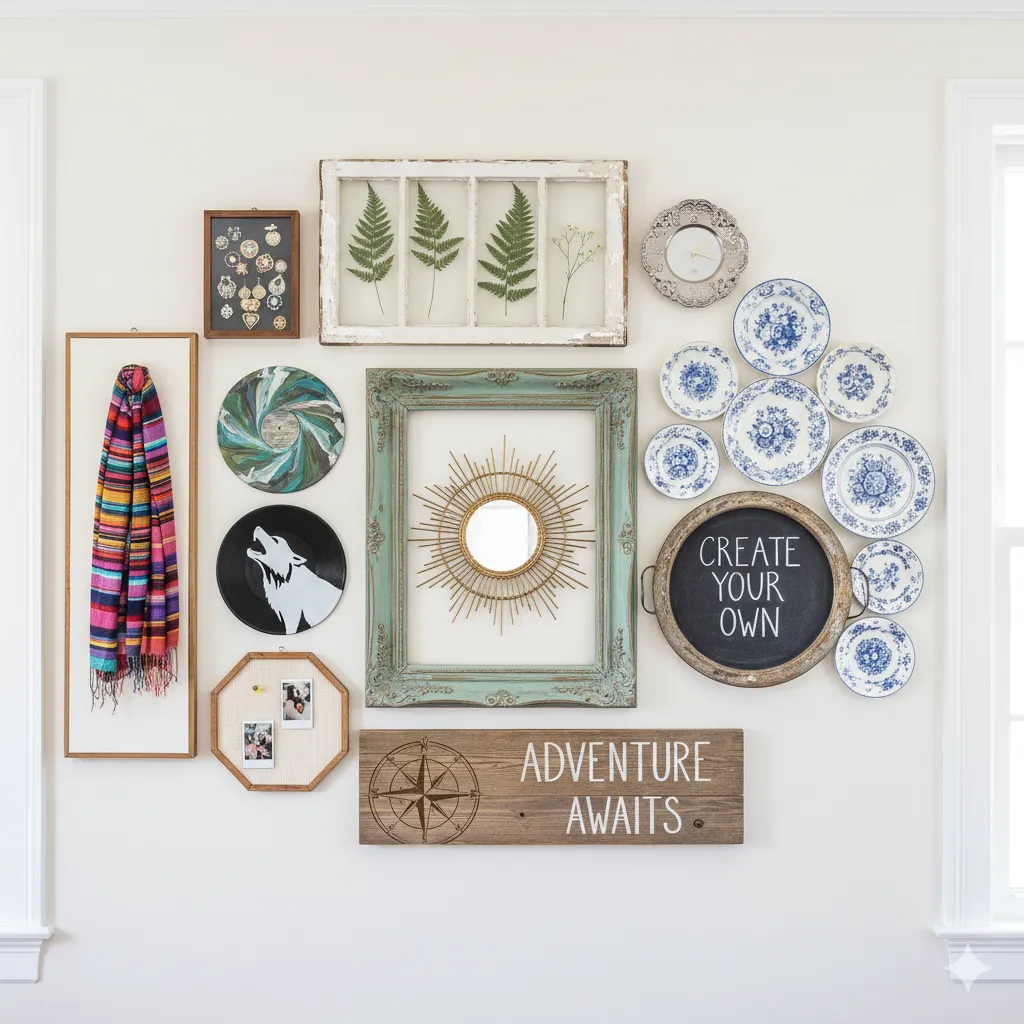
If you’re anything like me, you probably have a million different ideas swirling in your head. Why choose just one? The eclectic collage wall is the ultimate way to show off all your thrifted treasures. This is where you can combine a few of the ideas we’ve talked about today.
Mix and match framed art, mirrors, plates, and even your DIY projects on a single wall. The trick to making it work is creating balance. Play with different shapes, sizes, and textures to keep the eye moving. Arrange everything on the floor first so you can get the layout just right before you commit.
Styling Tip: To keep your eclectic gallery wall from looking chaotic, pick a dominant color and a secondary accent color. Make sure your pieces have at least a hint of those colors to create a cohesive theme throughout the collage.
Ready to Go Treasure Hunting?
So there you have it—17 incredible DIY wall art ideas to get your creative juices flowing. Thrift stores are full of hidden potential for budget-friendly wall decor. The only thing holding you back is your imagination.
Don’t feel like you have to tackle a huge gallery wall all at once. Start small. Pick one idea that speaks to you and give it a try. You’ll be amazed at what you can create with a little bit of creativity and a good eye for thrifted treasures.
I’d love to see what you come up with! Please save these ideas to your Pinterest boards and share your own thrifted wall art projects with me. Happy hunting!
