Picture this: you’re chopping onions for dinner, and you see that little dry root end you’d normally toss. What if I told you that scrap holds the potential for a thriving patch of flavorful onions right in your own garden? No expensive trips to the nursery, just pure, satisfying, home-grown goodness.
I know what you’re thinking. Growing onions seems complicated, something best left to farmers with big fields. But trust me, as someone who once wasted entire bags of sprouting store-bought onions, you can absolutely do this. They’re a kitchen staple, incredibly easy to grow, and the flavor of fresh, homegrown onion simply blows the supermarket stuff out of the water.
In this post, you’ll discover how to grow onions easily, whether you’re starting from scratch with seeds or sets, or proving your gardening chops by regrowing from kitchen scraps. We’re covering everything: which types of onions you need for your zone, how to prepare the perfect bed, the secrets to getting those huge, beautiful bulbs, and how to store them for months.
Ready to turn a trash-bound scrap into a flavorful harvest? Let’s dig in and plant the foundation for a lifetime of onion-fueled cooking.
Choosing the Right Onion Variety & Starting Method
You can’t just grab any old seed packet and expect success. Onions are finicky about the length of the day, which means you need to match your types of onions for home garden to your geographic location.
1. Match Your Onion to Your Day Length
This is the number one secret to bulb formation, so pay attention!
- Long-Day Onions: These need 14–16 hours of daylight to start forming bulbs. If you live in the North (above the 40th parallel, roughly the line between Pennsylvania and Kansas), these are your champions. Think varieties like ‘Walla Walla’ and ‘Yellow Sweet Spanish.’
- Short-Day Onions: They only need 10–12 hours of daylight for bulb formation. They’re perfect for the South (below the 35th parallel, roughly the line between North Carolina and Arizona). Favorites here are ‘Red Burgundy’ and ‘Texas Grano.’
- Intermediate-Day Onions: These are happy with 12–14 hours, working well for the middle zone between the 35th and 40th parallels. ‘Red Wethersfield’ is a great all-around choice here.
Picking the wrong type means you grow beautiful green tops, but the bulb remains tiny. No one wants that level of disappointment.
2. Seeds vs. Sets vs. Scraps
You have three main options for getting started. Which one is best depends on your patience level, IMO.
Starting from Seed
How to grow onions from seed gives you the widest variety of choices and is definitely the cheapest route. However, it takes patience. You need to start seeds indoors about 8–10 weeks before your last expected frost. Use a seedling tray and a seed-starting mix. When they look like thin, green blades of grass, they’re ready to move outside. This method is slow, but the selection of heirloom and specialty onions is unbeatable.
Starting from Sets
Onion sets are tiny, immature bulbs (they look like mini shallots). They’re basically onions that a grower started the year before and cured for you. These are the easiest and fastest way to get a harvest. You just stick them in the ground, and off they go. They’re my go-to for foolproof growing. How to plant onion sets is literally the simplest thing you’ll do all season—plant the pointed end up, bury until just the tip shows, done.
Starting from Scraps/Regrowth
If you want to try regrow onions from scraps, you’re turning a waste product into food—that’s top-tier gardening, FYI. This method is amazing for green onions (scallions), but also works surprisingly well for bulbing onions. We’ll get into the step-by-step for growing your own onions from kitchen scraps in a bit.
Site, Soil & Container Setup — The Foundation of a Flavorful Onion Harvest
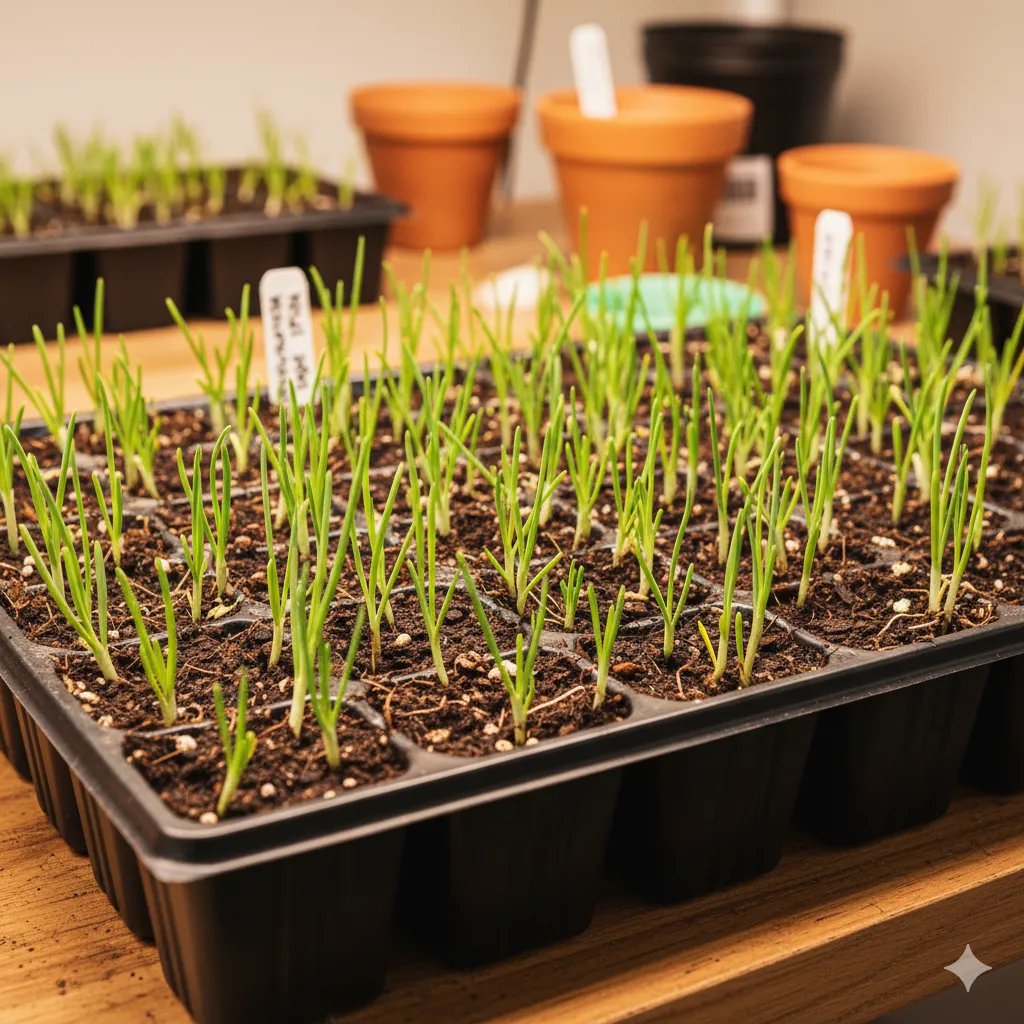
Onions are not drama queens, but they do have high standards for their living conditions. You can’t just toss them in any old corner.
3. Location, Location, Location
Onions are sun worshipers. They need full sun—at least six to eight hours of direct light every day. If you don’t have enough sun, they’ll grow spindly and the bulbs will sulk. Also, they despise competition. Plant them in a dedicated bed or container where weeds won’t choke them out.
4. Soil for Growing Onions
The single most important factor for a big, healthy bulb is well-drained, loose soil. If you have heavy clay, amend it heavily with compost and maybe some sand. Onions grow in the soil, not just on it, so they need room to push out those fat layers.
Before planting, loosen the soil at least 12 inches deep. Mix in plenty of aged compost. Onions are heavy feeders, so feed the soil upfront. The ideal pH is between 6.0 and 7.0, but honestly, if you load it with compost, you’re usually fine.
5. How to Grow Onions in Pots
Don’t have a yard? No sweat. You can master how to grow onions in containers on a patio or balcony. This is a brilliant solution for gardeners low on space.
- Size Matters: You need a container that’s at least 10 inches deep and wide—the wider the better to allow for spreading. A 5-gallon fabric grow bag works perfectly for about 8–10 onion sets.
- Drainage is King: Ensure your pot has excellent drainage holes. Soggy soil is the fastest way to kill an onion.
- Mix: Use a high-quality potting mix blended with compost. Avoid using heavy garden soil in pots.
Containers are also great because they warm up faster in the spring, which is a major boost for the starting process.
Planting & Regrowing From Kitchen Scraps
Once you have your seed, set, or scrap, it’s time to get down to business. Remember, when to plant onions is typically in the fall or very early spring, depending on your climate, so plan ahead!
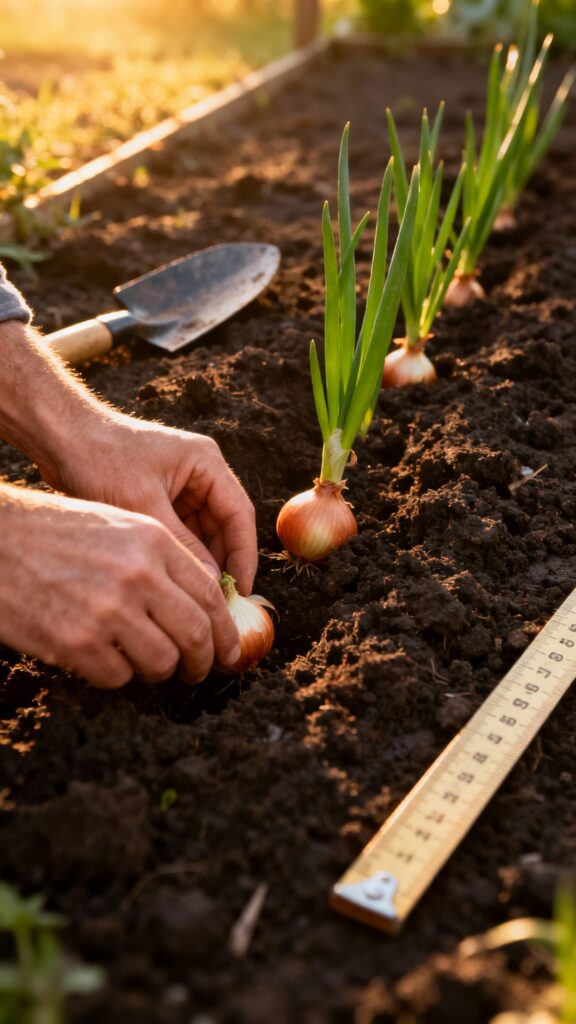
6. Planting Depth and Spacing
Whether you’re planting a set or a tiny seedling, depth is critical.
- Planting Depth: Plant sets so the pointed tip is just visible above the soil line. Seedlings should be planted deep enough to cover the roots and the white base, but no deeper than about half an inch.
- Spacing: Give them room! Space sets or seedlings about 4–6 inches apart in all directions. If they’re too close, they compete for nutrients and light, resulting in small, sad bulbs. If you’re growing green onions, you can jam them closer together—about two inches apart.
7. Regrowing Bulbing Onions (The Quick Method)
Want to skip the sets and regrow onions from onion bottom pieces? Here’s the deal:
- Prep the Scrap: Take the bottom end of a mature onion—the part with the roots attached—and slice it off about half an inch thick. You need those root nubs!
- Sprout: You can place this bottom piece root-side down in a shallow dish of water (just covering the roots) or directly into a small pot of moist soil. Keep it bright and warm. You’ll see green shoots in about a week.
- Transplant: Once the shoots are about three inches tall and the roots look healthy, transplant the whole piece into your garden or container. Cover it lightly with soil.
This method works, but be aware that the resulting onion might not be as perfectly formed or large as one grown from a set or seed. It’s a fun experiment, though!
Care, Watering, Feeding & Weed/Pest Management
This is where you determine whether you get puny, golf-ball-sized bulbs or giant heads that make you feel like a gardening legend. The secret to make onions grow bigger lies mostly in water and feed.
8. Consistent Watering is Non-Negotiable
Onions have shallow roots, meaning they can’t dig deep for moisture. They demand consistent moisture throughout the entire growing season.
- Keep Evenly Moist: You want the soil to feel like a wrung-out sponge, never soggy. Deep, infrequent watering is better than light, daily sprinkles.
- Avoid Rot: Too much water, especially in the last few weeks, can cause the bulbs to rot or split. Stop watering completely when the tops start to flop over—that’s the first sign of harvest readiness.
9. Feeding for Bigger Bulbs
Remember how I said they’re heavy feeders? They mean it.
- Start Strong: As we established, mix compost and a balanced fertilizer into the soil for growing onions before planting.
- Mid-Season Boost: Hit them again with a nitrogen-heavy fertilizer about three weeks after planting, and a final light feeding six weeks later. Stop feeding by early summer. You want nitrogen early for those big, leafy tops (more leaves = bigger bulbs) and then you cut it off to force the plant to focus on bulb development.
- Warning: Too much feeding, especially late in the season, results in thick necks that don’t cure well for storage. Don’t be greedy!
10. Onion Care Tips: Weeds, Pests, and Mulching
Onions despise competition from weeds. Since their roots are shallow, pulling weeds can easily damage your young onions. Keep the area around your plants absolutely weed-free.
- Mulch: A light layer of straw or dried grass clippings helps suppress weeds, keeps moisture even, and helps the soil stay cool. Just don’t let the mulch cover the forming bulb.
- Onion Companion Plants: Onions actually help you out! They repel pests like aphids and carrot rust flies. They’re excellent next to carrots, lettuce, and cabbage. Onion companion plants you should avoid, however, are beans and peas.
- Thinning: If you started from seed or have sets planted too close, thin them early. Don’t feel bad—you’re sacrificing the small ones for the greatness of the others.
Harvesting, Curing & Storage — Maximizing Flavor and Longevity
The final two steps—harvesting and curing—are where you preserve all that hard work and lock in the flavor. Mess this up, and your beautiful bulbs will rot in two weeks.
11. When to Harvest Onions
The onion itself tells you exactly when it’s done.
- The Flop: You know it’s time when to harvest onions when the green tops turn yellow and naturally fall over. This signals that the bulb has stopped growing and is focusing all its energy on ripening and preparing for storage.
- Wait and Loosen: Once the tops have flopped, wait about a week or two to allow the bulb to fully mature. Then, you can gently loosen the soil around the bulb with a fork a few days before pulling.
- Pull: On a dry, sunny day, gently pull the onions from the soil. Leave the tops and roots intact!
12. Curing Onions for Storage
Curing is the process of drying the outer skins and stems, which protects the inner layers from bacteria and mold. It turns a temporary success into a long-term one.
- Placement: Lay your onions out in a single layer in a warm, dry, and well-ventilated spot. A covered porch, garage, or shed works perfectly. Do not put them in direct sun or they’ll get sunburned.
- Timing: Let them cure for two to four weeks. The necks should feel completely dry and papery. The outer skin should also be dry and rustle when you touch it.
- Trimming: Once fully cured, trim the roots off close to the bulb and cut the neck/tops down to about an inch or two.
13. How to Store Onions Long Term
Properly cured onions can last for months. Keep them away from high humidity and extreme cold.
- Storage Location: Store in a cool, dark, dry place (ideally 45–55°F).
- Airflow: Store them in mesh bags, old stockings, or simply hang them. The traditional and highly aesthetic method of how to hang onions for storage is by braiding the softneck tops together. This provides excellent airflow and makes you look like a gardening pioneer.
- Proximity: Never store onions next to potatoes. The gases they emit speed up sprouting in each other. They’re both root veg, but they don’t play well together.
Bonus Hacks & Pinterest-Friendly Ideas
Since you’re already crushing the main process, why not add a few extra wins to your garden game? These are great ways to maximize space and flavor.
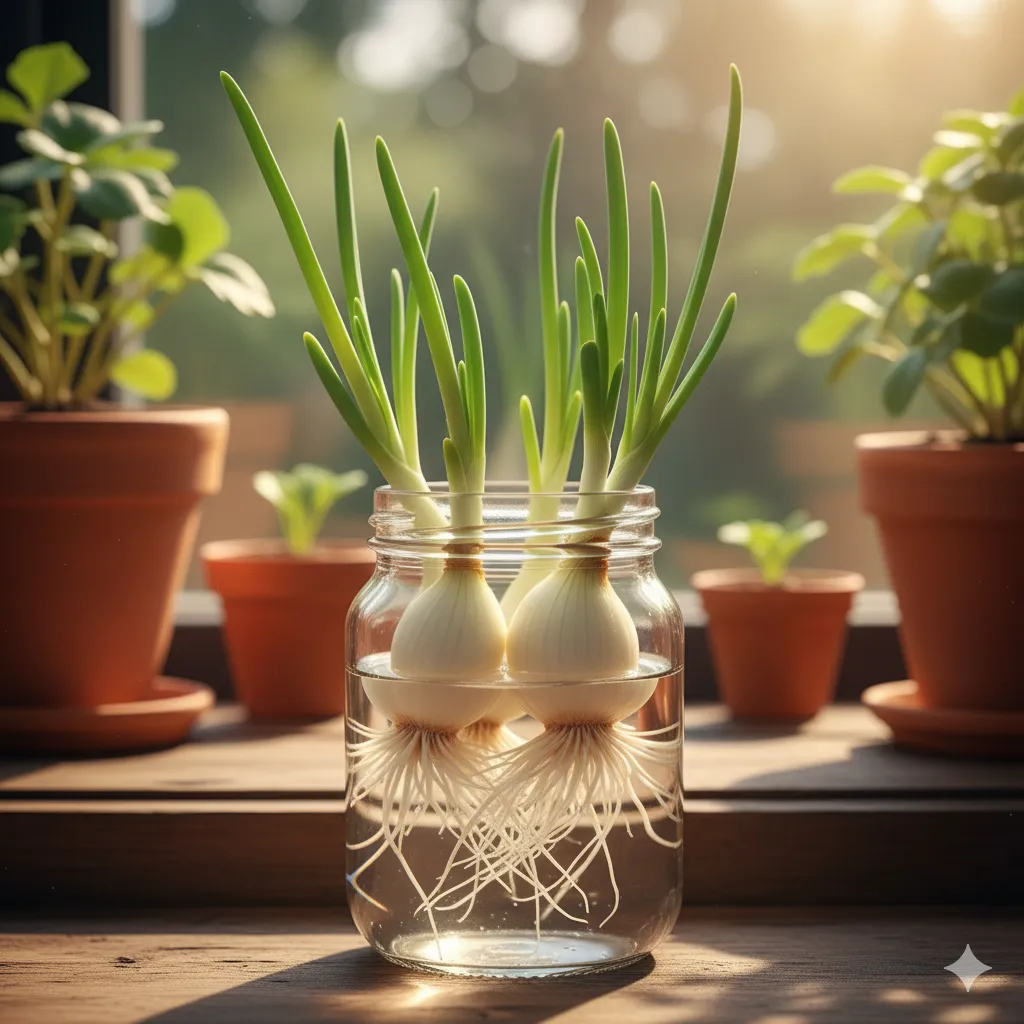
14. Grow Green Onions Indoors (Forever!)
This is the ultimate kitchen scrap hack. You can literally grow green onions indoors 365 days a year.
- Method: Save the white bottom of the scallion with the roots attached. Place them root-side down in a small glass jar with about half an inch of water.
- Light: Set the jar on a sunny windowsill.
- Harvest: Snip off what you need for a meal. They regrow in days! Change the water every couple of days to keep things clean. You can keep them in the jar indefinitely, or transfer them to a small pot of soil for a slightly longer-lasting supply.
15. Container Vegetable Gardening Onions
If space is your biggest challenge, growing onions in raised beds or containers (Pinterest+1!) is the perfect solution.
- Onion Vertical Towers: Use a tiered planter or even a DIY tower made from wood or wire mesh. Plant onions around the outside holes/edges. This maximizes the use of a small footprint while still giving the shallow roots enough soil depth.
- Interplanting: Onions are slim and fast-growing, making them perfect for tucking in between other, larger plants like tomatoes or peppers. This saves space and keeps pests away from your main crops.
16. The “Bulb-Boosting” Hack
Want the biggest bulbs possible? Once the bulbs start swelling, gently brush some of the soil away from the sides. This exposes the onion to more heat and light, signaling it’s time to expand its diameter. Don’t expose the entire bulb, just the top half. This simple hack seriously enhances their size. It works, IMO!
Conclusion
You’ve made it through the entire onion playbook! We started with a simple kitchen scrap and mapped out the process for getting those massive, flavorful bulbs. You’ve learned the non-negotiables: choosing the right day-length variety, ensuring fantastic soil drainage, and applying the proper water and feeding cadence. And now you know the final secrets to curing onions for storage so they last for months.
Growing your own onions means more than just cost savings; it means incredible flavor in every single dish and a genuine sense of pride in your home-grown food. It’s hard to beat that feeling of pulling a beautiful, crisp bulb from the dirt that was once just a tiny seed or a trash-bound scrap.
Why not grab three organic onions today—one for dinner, one for slicing into a container to keep your green onion supply going, and one to sprout and plant next spring? Take a picture of your jar setup and share your results on Instagram or Pinterest using #HomesMadeStylishOnions. And if you’re looking for other beginner-friendly kitchen staples, check out my guide on how to grow garlic or our tips for juicy homegrown tomatoes right in your containers! Happy planting!
